
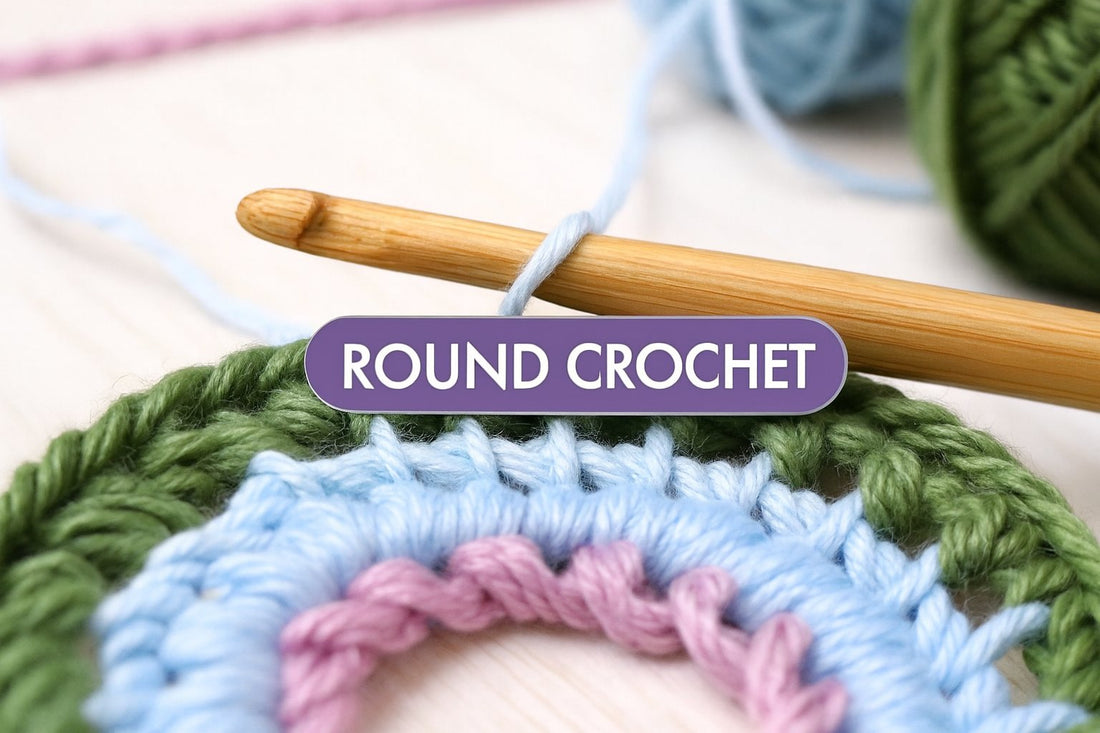
Ready to move beyond flat scarves and blankets? Learning how to crochet in the round is your ticket to a joyful world of three-dimensional projects. It’s the heartwarming magic behind everything from adorable amigurumi toys, our Crochetree dolls included, and cozy beanies to sturdy baskets, all built seamlessly from a central point outward.
Your Journey Into Round Crochet Starts Here
If you've ever admired a perfectly shaped handmade toy or a hat that fits just right, you were looking at the beautiful results of crocheting in the round. This technique transforms flat rows into flowing, sculptural shapes. It’s a wonderfully mindful process where you can literally watch your project take form with every stitch you make, creating moments of calm and connection.
Don’t be intimidated! This guide is here to walk you through it, making the whole learning curve feel simple and encouraging. We’ll start with the basics, getting your tools and yarn sorted, and guide you with confidence every step of the way.
Gathering Your Essential Tools
Before you dive in, let's get your toolkit ready. Having the right materials on hand from the start makes the whole process smoother and much more enjoyable. It lets you focus on the calming rhythm of your craft instead of hunting for a pair of scissors.
Here’s a quick overview of what you’ll need, with some friendly advice for beginners.
| Essential Tools for Crocheting in the Round |
| :--- | :--- | :--- |
| Tool | What to Look For | Why It's Important for Beginners |
| Crochet Hooks | A set of ergonomic hooks with comfortable grips. A versatile 4.0 mm hook is perfect for worsted-weight yarn. | Comfort is key! Ergonomic hooks reduce hand strain, letting you crochet for longer and find more joy in the process. |
| Yarn | A smooth, light-colored worsted-weight yarn is ideal for your first few projects. | Light colors and smooth textures make it much easier to see your individual stitches, which is a huge help when you're learning where to place your hook. |
| Stitch Markers | Small, plastic locking clips. | These little lifesavers mark the beginning of each round so you don't have to guess or count constantly. You'll wonder how you ever crocheted without them! |
| Scissors & Tapestry Needle | A small, sharp pair of scissors and a tapestry or yarn needle with a large eye. | Clean cuts prevent fraying, and a tapestry needle is essential for weaving in your ends to give your finished project a polished, professional look. |
Setting yourself up with these simple items will make learning to crochet in the round feel like a breeze.
Choosing the Right Yarn for Your Project
The yarn you pick does more than just determine the color of your project; it affects the entire look, feel, and structure. Understanding the basics of fiber and weight will empower you to bring your vision to life.
For amigurumi and other detailed toys, we recommend 100% mercerized cotton in a fingering weight (a thin yarn great for detail). It gives you incredible stitch definition, holds its shape firmly without much stretch, and is durable enough for well-loved keepsakes. You get those crisp, clean stitches that make amigurumi look so neat and professional.
Crafting is a personal journey, and your materials are your partners. The right yarn doesn't just build a project; it builds a connection to the piece you're creating.
For other circular projects, you have some wonderful options, each with its own personality:
- Mercerized cotton (fingering): Smooth, durable, crisp stitch definition; holds shape, ideal for amigurumi/detail work.
- Cotton blends (DK/worsted): Breathable, easy care, good for summer garments, dishcloths, homeware.
- Acrylic (mostly worsted): Budget-friendly, machine-washable, common for blankets and everyday projects (note potential pilling/static).
- Wool/wool blends: Warm, elastic, great stitch recovery, hats, sweaters; check care/sensitivity.
- Chenille/faux-fur: Plush texture for blankets/pillows; not recommended for beginner amigurumi (low stitch visibility).
Choosing Your Starting Point: Magic Ring vs Chain Loop
Every project crocheted in the round needs a solid foundation. You'll generally run into two ways to start: the magic ring or the chain loop. Figuring out which one to use can make a huge difference in how your finished piece looks and feels.
The magic ring, also called an adjustable ring, is the go-to for amigurumi makers. Why? Because it pulls completely shut, leaving zero hole in the middle. This gives you that clean, professional finish that's essential for stuffed toys where you don't want stuffing peeking through. Think of it like a tiny drawstring bag: you can cinch it up for a perfectly seamless start.
On the other hand, we have the classic chain loop. This method involves making a short chain and joining it into a circle with a slip stitch. It’s sturdy and straightforward, but it almost always leaves a small but visible gap in the center. While that’s totally fine for projects like granny squares or certain hats, it’s not the best look for amigurumi.
The Magic Ring for a Flawless Start
For amigurumi, the magic ring is a true game-changer. It can feel a little like a finger puzzle the first few times you try it, but once that "aha!" moment clicks, you'll see why it's so loved. It lets you create an incredibly tight starting point, which is key for giving your dolls that polished, well-made appearance.
Because you can pull the opening completely closed, your first round of stitches will be perfectly snug. If you need a more detailed walkthrough, our step-by-step guide on how to make a magic circle for crochet is here to help. This is the exact technique that stops that tiny hole from forming at the top of amigurumi heads or bodies.
The Chain Loop: A Sturdy Alternative
The chain loop is the classic way to start crocheting in the round, and it’s often the first method beginners learn. To make one, you simply chain a few stitches (usually four), then join the last chain to the first with a slip stitch. Voilà, you've got a little ring.
From there, you just work your first round of stitches directly into the center of that ring. Sure, it leaves a little hole, but that can be a charming feature in some designs, like the center of a flower coaster or a classic granny square. It gives you a fixed, stable center that won't ever come undone.
Still not sure which one is right for your project? Let’s put them side-by-side.
Magic Ring vs Chain Loop: A Quick Comparison
Understand the key differences to help you decide which starting method is right for your project.
|
Feature |
Magic Ring (Adjustable) |
Chain Loop (Fixed) |
|---|---|---|
|
Closure |
Pulls completely shut; no hole. |
Leaves a small, permanent hole. |
|
Best For |
Amigurumi, hats, and any project needing a seamless start. |
Granny squares, mandalas, and openwork designs. |
|
Adjustability |
Fully adjustable until you weave in the end. |
The center hole size is fixed once created. |
|
Security |
Very secure once the end is woven in properly. |
Extremely stable from the start; cannot unravel. |
|
Difficulty |
Can be tricky for absolute beginners to master. |
Very easy and straightforward; great for beginners. |
Ultimately, the choice comes down to the look you want to achieve.
Your starting method is the heart of your project. Choosing the right one sets the tone for the entire piece, turning a simple circle into a work of art.
So, how do you decide? Here’s a simple rule of thumb:
- For Amigurumi: Always go with the magic ring. That seamless finish is non-negotiable and totally worth the practice.
- For Hats or Baskets: Either method works just fine! The small hole from a chain loop is often hidden or simply becomes part of the design.
- For Granny Squares: The chain loop is the traditional choice for a reason. It just looks right.
In the end, both methods are valuable tools to have in your crochet toolkit. The best thing you can do is try both. Getting comfortable with each will give you the confidence to pick the perfect foundation for whatever amazing project you dream up next.
Building Your Shape with Smart Increases
Alright, your starting ring is set. Now for the really fun part: watching your project actually start to grow! This little bit of magic is all thanks to increases. An increase is just the simple act of working two stitches into a single stitch from the previous round. It’s the core technique you'll use to make your fabric expand.
How you place these increases is what dictates the final shape of your project. Space them out evenly, and you get a perfect, flat circle, the starting point for coasters, baskets, and the top of a beanie. Bunch them up, and you can create playful ruffles and decorative edges. This one simple move is your key to shaping.
The Simple Math of a Flat Circle
Don't let the word "math" scare you off. Creating a flat circle follows a wonderfully predictable and almost meditative pattern. The rule is incredibly straightforward: for each new round, you just need to add the same number of stitches you started with. That's it.
So, if you began with 6 single crochet stitches in your magic ring, you’ll add 6 more stitches in every single round that follows to keep your circle from curling.
Here’s how that looks in practice:
- Round 1: You have 6 stitches.
- Round 2: Increase in every stitch. You’ll end up with 12 stitches.
- Round 3: Increase in every second stitch. Now you have 18 stitches.
- Round 4: Increase in every third stitch, bringing you to 24 stitches.
See that rhythm taking shape? The number of regular stitches between your increases grows by one each round. This consistent growth is the secret to avoiding any unwanted curling or ruffling. If you want a closer look, our guide to the single crochet increase breaks this essential stitch down even further.
An increase is more than just an extra stitch; it’s a creative instruction. Each one tells your yarn exactly where to go, shaping your project with intention and care.
Why Consistent Increases Matter
Once this principle clicks, it's a total game-changer. You’re no longer just blindly following a pattern; you’re starting to understand the language of crochet. You can see why a project is taking the shape it is and even anticipate what comes next.
Your yarn will start talking to you, too. If your circle begins to curl up like a little bowl, it's telling you it needs more room to grow, you've likely missed an increase. And if it starts to ruffle like a potato chip? That's your yarn telling you it has too much fabric and you’ve probably added too many increases. Learning to read these little signs is what turns you from someone following instructions into a truly confident maker.
This knowledge gives you the creative freedom to start tweaking patterns or even designing your own simple projects. You can adjust the size of a basket or customize the fit of a hat, all by mastering this one powerful technique. It's the moment you realize you're the one in control of the hook and yarn.
Joined Rounds vs. Continuous Spirals
Once you get your project started, you'll hit a fork in the road that really defines its final look: how to move from one round to the next. The two main paths are joined rounds and continuous spirals. Each one has a totally different vibe, and picking the right one is all part of the fun.
Think of joined rounds like building distinct circular "floors" in your project. At the end of every round, you'll use a slip stitch to connect the last stitch to the first, then chain up to get the height for the new round. This gives each layer a clear beginning and end.
This approach is my go-to for anything with frequent color changes, like a striped beanie or a patterned basket, because it keeps the color transitions crisp and lined up. It does create a very subtle, often diagonal seam where the rounds connect. If you want to make that seam practically invisible, our guide on how to join crochet rounds has some great tricks.
The Beauty of the Continuous Spiral
On the other hand, the continuous spiral is the absolute rockstar of amigurumi. Just like it sounds, you simply keep on stitching without ever joining the rounds. Once you finish one round, you dive right into the next, creating a smooth, uninterrupted fabric that just flows.
This is why it's perfect for toys and characters. It completely gets rid of the seam, giving your little creations that polished, professional finish we all want. The only catch? A stitch marker is non-negotiable. Without one, you'll lose track of where your rounds begin and end in a heartbeat.
Choosing your method is like choosing a paintbrush. A continuous spiral creates a soft, blended look, while joined rounds give you crisp, defined lines. Both are beautiful, it all depends on the story you want to tell with your stitches.
When to Use Each Method
So, how do you decide which one is right for your project? Here’s a simple way to think about it:
1. Choose Joined Rounds For:
- Projects with stripes or distinct color blocks where you need clean lines.
- Hats where you want the round structure to be part of the design.
- Any pattern that specifically tells you to join each round.
2. Choose Continuous Spirals For:
- Amigurumi and stuffed toys (this is the standard, and for good reason!).
- Projects where a seamless finish is your top priority.
- Baskets or bags where you want a smooth, flowing texture without a visible join.
Ultimately, the best way to really get a feel for them is to try both. Every stitch you make is a step on your crafting journey, and learning these foundational skills opens up a whole new world of creative possibilities.
Troubleshooting Common Issues with Confidence
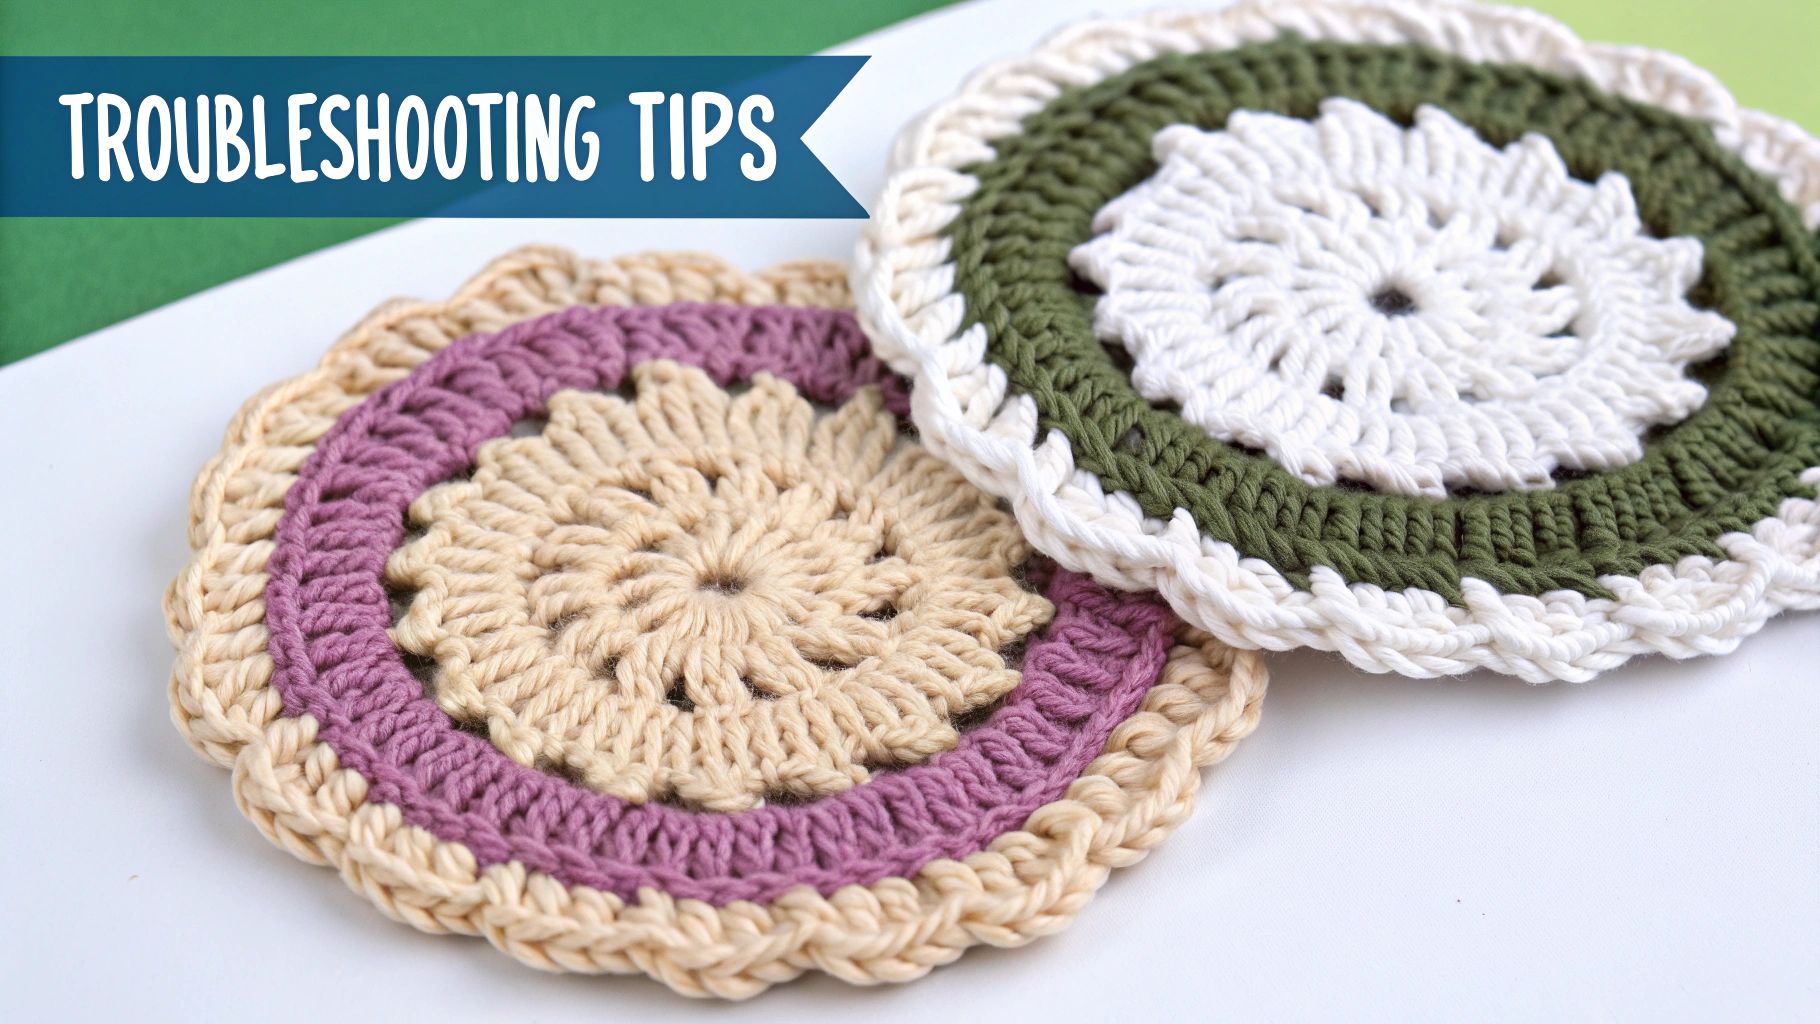
Sooner or later, every crafter runs into a few bumps in the road. It's totally normal. Try to think of these moments not as mistakes, but as your yarn’s way of talking to you. Learning to listen is a huge part of building your confidence and truly mastering how to crochet in the round.
When your work starts to look a little different than you imagined, the fix is usually simple. Don't panic! We've all been there. These little challenges are just opportunities to really understand your stitches and polish your technique.
My Circle Is Ruffling Like a Potato Chip
Does your supposedly flat circle have wavy, ruffled edges? This is a classic sign you’re adding too many increases, too quickly. The fabric is basically growing faster than it needs to, which forces it to bunch up.
Here are some gentle fixes you can try:
- Frog It: The simplest fix is to gently pull out your stitches (a technique we lovingly call "frogging" because you "rip-it, rip-it") back to the last round that laid perfectly flat.
- Check Your Pattern: Take a second look and make sure you’re adding the right number of regular stitches between your increases for that specific round.
- Add a "Plain" Round: Sometimes, just working one full round with no increases at all can help calm the ruffles and give the fabric a chance to even out.
My Project Is Curling Into a Bowl
On the flip side, if your circle starts to curl up and look like a little bowl or cone, it's telling you it needs more room to grow. This happens when you have too few increases, and the fabric is pulling inward because the circumference isn't expanding enough.
This one is an easy fix! You most likely just missed an increase or two in the last round. Just take a moment to count your stitches and make sure you’re following the even-increase formula we talked about earlier.
Learning to read your work is a beautiful milestone in your craft journey. It’s the moment you shift from just following a pattern to actually having a conversation with your project.
Common Questions About Crocheting in the Round
As you get comfortable with circular projects, some questions are bound to pop up. Every single crafter runs into these little snags, so let’s tackle some of the most common ones together.
Think of this as a quick chat to clear up any confusion and give you that extra boost of confidence to keep your hook moving.
Can I Use Any Yarn for Amigurumi?
While you can technically use any yarn, some are much better suited for amigurumi than others. The goal is to create a firm, dense fabric that holds its shape and keeps the stuffing hidden where it belongs.
That’s why so many designers recommend 100% mercerized cotton in a fingering weight. It has fantastic stitch definition and very little stretch, giving you a smooth, durable finish. On the flip side, trying to use a fuzzy yarn like chenille can be tricky for beginners because it’s almost impossible to see your stitches.
Why Does My Starting Point Look Like a Hexagon?
First off, don’t panic! If your flat circle is starting to develop corners and look more like a hexagon, it's a sign you're doing something right: your increases are consistent. This happens when you stack your increases directly on top of each other in every round, which naturally creates subtle points.
Embracing the small imperfections is part of the handmade journey. A slight hexagonal shape is just a sign that your stitches are consistent, and it's a simple fix if you want a smoother edge.
To get a more rounded shape, you just need to "stagger" or "rotate" your increases. For example, if your pattern says [3 sc, inc], try breaking it up. Start the round with 1 sc, inc, then continue with the [3 sc, inc] repeats as normal. This tiny shift is enough to break up the straight lines of the increases and smooth out the edges beautifully.
How Do I Keep My Stitch Count Accurate?
Losing your place is probably the number one frustration for crocheters, but it's completely avoidable with a couple of good habits.
1. Use a Stitch Marker: Always, always place a stitch marker in the first stitch of every round. When you get back to it, you know you’ve completed a full circle. Just move it up each time you start a new round. It’s your best friend when working in a continuous spiral.
2. Count Every Round: Before you move on, take 30 seconds to count the stitches in the round you just finished. It's so much easier to fix a mistake right away than to realize it three rounds later and have to frog all your hard work.
Make these two simple actions part of your routine, and you'll save yourself a ton of headaches.


![The Ultimate Beginner's Guide to Crochet [2026]](http://crochetree.com/cdn/shop/articles/feat-ultimate-beginners-guide-to-crochet_eae81cec-84d0-455d-b190-08cd22d826c4.jpg?v=1777713815&width=533)


