
You’ve poured so much love and time into every single stitch, and now you’re at the finish line. That final step is where the real magic happens. Crochet finishing techniques are what take your project from almost done to absolutely stunning. These are the little touches that give your work that polished, professional look we all strive for.
Why the Final Touches Define Your Crochet
Finishing your work is so much more than just the last thing on your to-do list; it’s an act of care that honors all the hours you’ve spent creating. Think of it like framing a beautiful painting. The right frame makes the art pop, and the right finishing techniques make your crochet shine.
These skills aren’t just for looks, either. They add durability, improve the drape of a garment, and truly elevate your craft from a hobby into an art form. When you take the time to finish a project properly, you're ensuring it will last and be cherished for years. A neatly woven end won't unravel after a few washes, and a perfectly blocked blanket will lay flat and beautiful. This guide is here to help you master these satisfying skills.
Small Steps, Big Impact
You don't need to learn a dozen complicated methods to see a huge difference. Focusing on just a few core techniques can completely transform the quality of your work. We'll explore the essentials together, including:
Weaving in Ends Invisibly: Say goodbye to bulky knots and pesky tails that poke out.
The Power of Blocking: Learn how to shape your projects for even stitches and a perfect fit.
Adding Beautiful Edges: Frame your work with decorative borders that add personality and structure.
Finishing is where your patience and passion come together. It's the quiet moment you spend with your creation, giving it the final touches of love it deserves before sharing it with the world.
A Craft Evolving with Its Tools
Believe it or not, the way crocheters finish their work has always been tied to the tools they used. Back in the day, hooks were made from ivory or bone. As they evolved into the modern cylindrical hooks we use now, more complex finishing styles became possible.
With just a little practice, these simple skills will become a joyful part of your creative process. You’ll be crafting pieces that aren't just beautiful but are filled with pride.
The Invisible Art of Weaving in Ends
Let's start with the one task every crocheter faces, the one that often stands between you and a truly finished project: weaving in those pesky ends. Mastering this is so much more than a chore. It's the foundational skill that marks the difference between a project that lasts a lifetime and one that sadly unravels.
This is the quiet moment of care that gives your work a seamless, professional look from every angle. When you get the hang of the right methods, this step transforms from a dreaded task into a satisfying little ritual. You’ll be able to confidently snip that final tail, knowing your stitches are secure and all your hard work is beautifully preserved. It’s easily one of the most important crochet finishing techniques to build your confidence.
Why Method Matters More Than Speed
It’s tempting to just quickly poke the yarn tail through a few stitches and call it a day. We've all been there! But while it's fast, this approach is a recipe for future unraveling, especially for items that will be handled or washed often. A truly secure finish requires a little more intention, but the peace of mind is well worth it.
The real goal isn't just to hide the yarn, but to lock it into the very fabric of your project. This means working with the existing stitches, mimicking their path, and using their structure to create friction that holds the end firmly in place.
The Golden Rule: Change Direction Three Times
If you remember only one thing from this section, let it be this: always change direction at least three times. This simple back-and-forth motion is the secret to preventing a tail from wiggling its way out over time.
Think of it like tying a secure knot without actually making one. By weaving the yarn in one direction, then back over itself, and then forward again, you create a tiny, interlocking path that is incredibly resistant to pulling loose.
First Pass: Weave the tail under 4-5 stitches in one direction.
Second Pass: Turn and weave back in the opposite direction, making sure to go under a different set of loops to create more friction.
Third Pass: Make one final, shorter pass in the original direction to fully lock it in.
The most beautiful finishes are often the ones you can't see. Taking the time to weave in your ends invisibly is an act of love for your craft and a gift of durability to whoever receives your creation.
Tailoring Your Technique to the Project
Not all yarn and projects are the same, so your weaving technique shouldn't be, either. The method you use for a sturdy amigurumi toy will be different from the one you need for a delicate, lacy shawl.
For Sturdy Amigurumi and Toys
Amigurumi projects need to be extra durable, especially if they’ll be loved by little hands. For our dolls, we recommend using 100% mercerized cotton in a fingering weight (a thin yarn great for detail). Its smooth, strong fibers create crisp stitches that hold their shape well and stand up to lots of cuddles.
When weaving in ends on a stuffed toy, you can be a bit more aggressive. After following the three-pass method on the inside of the piece, you can securely pass the remaining tail straight through the stuffing and out the other side. Snip it flush with the surface, and the end will pull back inside, disappearing forever.
For Garments and Blankets
With wearable items or blankets, the goal is a finish that is both secure and invisible, without creating any stiff spots in the fabric. Choosing the right yarn is key, and you have wonderful options depending on your project's needs:
Cotton blends (DK/worsted): Breathable and easy to care for, making them great for summer garments and homeware.
Acrylic (mostly worsted): A budget-friendly and machine-washable choice, perfect for blankets and everyday projects.
Wool/wool blends: Warm and elastic with great stitch recovery, ideal for cozy hats and sweaters.
For these projects, try splitting the plies of your yarn tail for a truly invisible finish. After your first weaving pass, separate the tail into two smaller strands and weave each in a slightly different direction before snipping. This feathers the end into the fabric, making it virtually undetectable.
Ultimately, securing your work starts right after the last stitch. Learning how to crochet fasten off properly sets the stage for easy and effective weaving. Think of it as your final promise to your project, ensuring it remains as beautiful as the day you finished it.
How Blocking Transforms Your Crochet Projects
If weaving in ends is the foundation of a durable finish, blocking is where your project truly blossoms. This gentle process of wetting and shaping your work is one of the most accessible and impactful crochet finishing techniques you can learn. It's the secret behind perfectly flat granny squares, lace shawls with open and airy stitches, and garments that drape just right.
Think of your crocheted fabric like a memory foam pillow. The stitches can get a bit compressed and uneven from being handled. Blocking is the moment you fluff that pillow, allowing every fiber to relax, expand, and settle into its most beautiful and intended shape. It’s a quiet, mindful step that rewards your patience with a truly professional result.
What Is Blocking and Why Does It Work?
At its core, blocking is simply using moisture and tension to persuade yarn fibers to relax and conform to a specific shape. When natural fibers like wool or cotton get wet, they become pliable. As they dry in their new, pinned-out position, the fibers "set" and remember that shape.
This process works wonders on projects that look a little wonky or curled right off the hook. A blanket might have slightly wavy edges, or a lace scarf may look like a jumbled bunch of stitches. Blocking coaxes everything into place, evening out your tension and dramatically improving the fabric’s overall appearance and feel. It’s the final deep breath your project takes before it's ready for the world.
Choosing Your Blocking Method
There are three main ways to block, and the one you choose really depends on your yarn fiber and how much time you have. Each has its own gentle power to shape your creations.
The image below gives you a quick visual of how long each method typically takes.
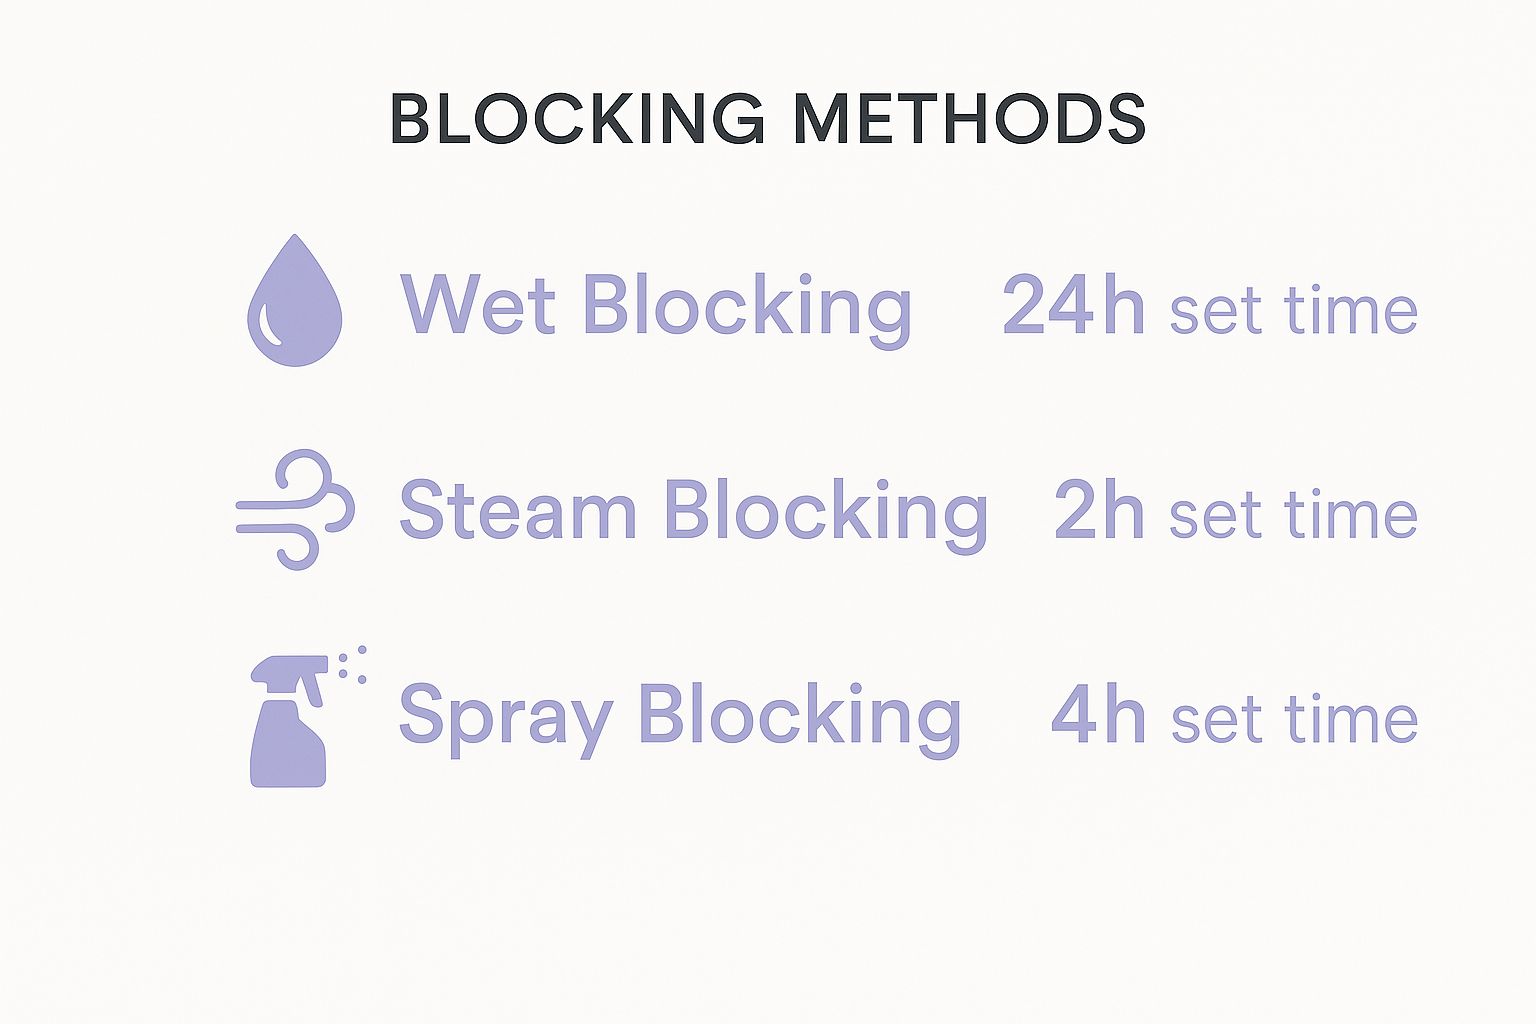
As you can see, wet blocking requires the most patience but gives a deep, thorough shaping. Steam blocking, on the other hand, is much faster and perfect for certain fibers.
To make sure you're treating your yarn right, it's crucial to match the blocking method to the fiber. Some yarns can be damaged by the wrong technique, so a little know-how goes a long way.
Choosing the Right Blocking Method for Your Yarn
This table helps you select the best blocking technique based on the fiber content of your yarn to ensure safe and effective results.
|
Yarn Fiber |
Recommended Blocking Method |
Why It Works Best |
|---|---|---|
|
Wool & Animal Fibers (Alpaca, Mohair) |
Wet Blocking or Steam Blocking |
These fibers have a natural "memory" and bloom beautifully when fully saturated. Steam is a good alternative for delicate fibers like mohair. |
|
Plant Fibers (Cotton, Linen, Bamboo) |
Wet Blocking or Spray Blocking |
These fibers need significant moisture to relax. Wet blocking is most effective, but spray blocking works for lighter shaping. |
|
Acrylic & Synthetic Blends |
Steam Blocking |
Heat from steam permanently "kills" the acrylic fibers, relaxing them into shape. Never let a hot iron touch the yarn directly! |
|
Delicate Fibers (Silk, Cashmere) |
Spray Blocking or gentle Steam Blocking |
These luxury fibers can be damaged by soaking or high heat. A light mist or careful steaming is the safest approach. |
Choosing the right method ensures your project not only looks its best but also maintains its integrity for years to come.
Wet Blocking
This is the most intensive method, perfect for natural fibers like wool, alpaca, and non-mercerized cotton. You'll fully submerge your project in lukewarm water for about 20-30 minutes, gently squeeze out the excess water (never wring it!), and then pin it to shape on a blocking mat or towel to dry completely.
- Best for: Wool and wool blends, as it helps the fibers bloom beautifully.
- Actionable Tip: Roll your damp project in a thick towel and press firmly to absorb most of the water before pinning. This trick can honestly cut drying time in half.
Steam Blocking
Steam blocking is a great choice for acrylic yarns and delicate fibers that shouldn’t be soaked, like silk or mohair. You’ll pin your dry project to shape first, then use a garment steamer or the steam function on an iron to apply gentle heat. Hold the iron several inches above the fabric! The key is to never let it touch the yarn, especially acrylic, as it can melt or "kill" the fibers.
- Best for: Acrylic, cotton blends, and delicate fibers.
- Actionable Tip: Keep the steamer or iron moving constantly to distribute the steam evenly and prevent any single area from getting too hot.
Spray Blocking
The gentlest of the three, spray blocking is ideal for projects that only need minor shaping or are made from fibers that respond well to light moisture, like mercerized cotton. Pin your dry project to your desired dimensions, then use a spray bottle to lightly mist it with water until it's damp, but not soaked. Then, you simply let it air dry.
- Best for: Projects needing light shaping, like doilies or sturdy cotton pieces.
- Actionable Tip: I always recommend using rust-proof pins. It's a small detail that prevents any nasty surprise marks on your beautiful work as it dries.
Blocking isn’t about fixing mistakes; it’s about revealing the true beauty that was already there in your stitches. It’s the final gesture of care that allows your project to fully become what you envisioned.
Blocking is more than just a cosmetic step; it genuinely impacts the quality and longevity of your handmade items. In fact, professional crafters swear by it. It’s estimated that about 60% of handcrafted crochet items sold in North America use finishing techniques like blocking to improve stability and appearance, which can increase an item’s lifespan by up to 40%.
No matter which method you choose, the result is a project that looks more polished, feels softer, and functions better. Once you see the incredible difference it makes, I promise blocking will become an indispensable, and even enjoyable, part of your creative process.
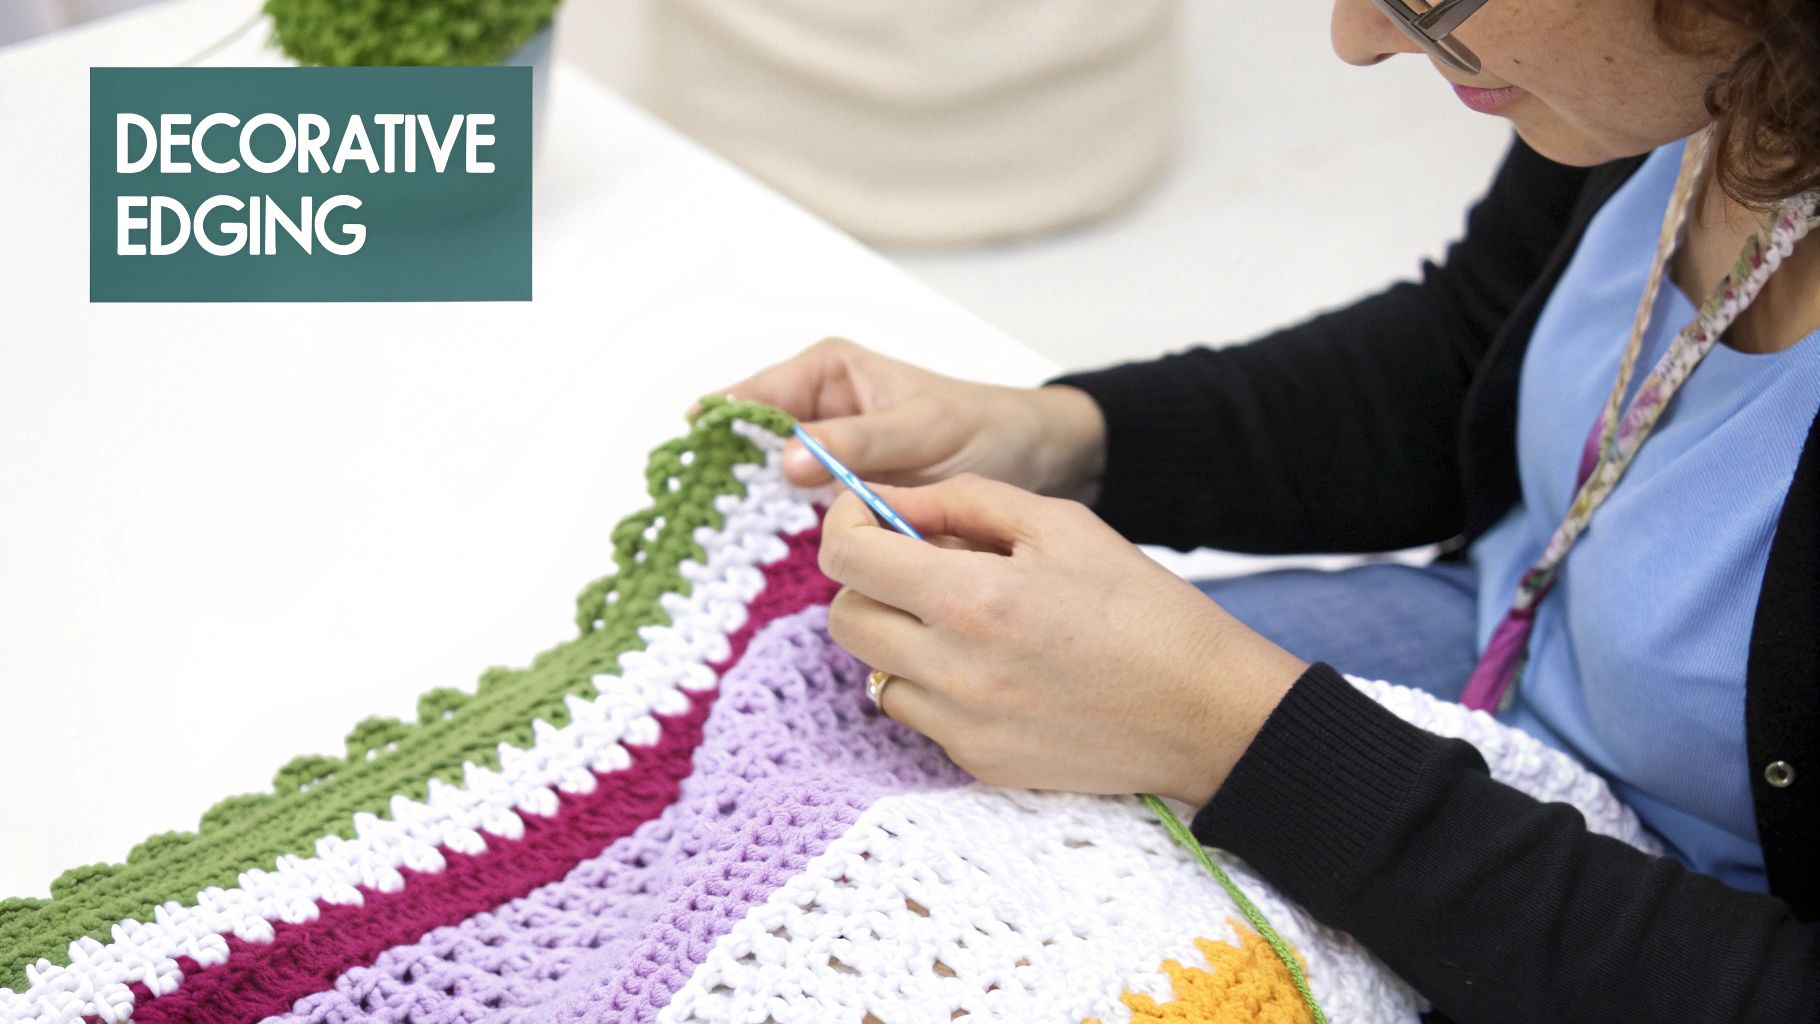
Adding Polished Edges and Borders
A thoughtful border is like the perfect frame on a photograph. It elevates everything within it. This is one of the most creative and satisfying parts of finishing a crochet piece, turning a simple project into something truly special. Adding a polished edge does more than just look pretty; it adds structure, tames curling sides, and gives your work a complete, professional look.
This is your chance to really let your personality shine through. Whether you're finishing a simple cotton dishcloth or a cozy wool-blend afghan, the right border can make all the difference. We’ll walk through a few classic, beginner-friendly options that will give your projects that extra touch of love.
Preparing for a Perfect Border
Before you can jump into the fun stitches, a little prep work is essential. The secret to a flat, even border is a well-placed foundation round. This is especially crucial when you're working along the "raw" sides of your project, the edges made up of row-ends rather than the neat tops of stitches.
Your goal here is to create an even base of single crochet stitches all the way around your project. If you cram too many stitches in, your border will get wavy and ripple. Too few, and it will pucker and pull the whole thing inward.
A border isn't just an afterthought; it's a structural element that brings harmony and stability to your entire piece. Take your time with the foundation, it's the most important step.
A great rule of thumb for your foundation round is:
- Along the top and bottom edges: Place one single crochet in each stitch across.
-
Along the side edges:
- Place one single crochet for each row of single crochet.
- Place two single crochet stitches for each row of double crochet.
Think of this as a starting point, and trust your gut. If the fabric starts to curl or wave, don't be afraid to pull it out and adjust your stitch count. Using stitch markers every 10-15 stitches can help keep your spacing consistent and spot any issues early. Getting this part right is a big deal, and if you find your sides are often uneven, mastering how to crochet straight edges can be a total game-changer for your foundation rounds.
Simple and Elegant Edging Stitches
Once your foundation round is complete and looking good, you're ready for the fun part. Here are three timeless borders that are perfect for beginners and add a touch of class to just about anything.
The Clean Single Crochet Border
Sometimes, less is more. A few rounds of single crochet create a clean, minimalist frame that looks fantastic on modern blankets, washcloths, and even amigurumi accessories. It provides a sturdy, flat edge that won't distract from the main piece. To keep the corners sharp and not rounded, work three single crochet stitches into each corner stitch of your foundation round.
The Graceful Shell Stitch Border
The shell stitch is a classic for a reason. It adds a gentle, scalloped wave that feels both traditional and beautiful. It's a wonderful choice for baby blankets, shawls, and the cuffs of sleeves.
To create a simple shell, you'll typically work five double crochet stitches all into the same stitch. Then, you'll skip a couple of stitches and slip stitch into the next one to anchor it before starting the next shell. It's a rhythmic, soothing pattern to work on.
The Delicate Picot Edge
For a touch of dainty, vintage charm, you can't beat the picot. A picot is just a tiny decorative loop that adds a lovely, textured detail to your edge. It’s perfect for doilies, the hem of a child's dress, or any project where you want a delicate, lacy feel.
You can easily add picots to a single crochet border. Just work a few single crochet stitches, then chain three and slip stitch back into the first chain to create the little point. It’s a simple move with a huge visual impact.
A Rich History of Decorative Finishes
Adding beautiful edgings is a practice with deep roots in crochet history. These techniques aren't some modern trend; they have evolved right alongside the craft itself. Back in the late 1800s, for example, Irish crochet became famous for its intricate lace, which relied heavily on detailed finishing touches like picots and shells to create its signature look. These borders didn't just add beauty. They also provided stability and durability to the delicate fabric.
Choosing a border is a wonderful way to infuse your personality into your work. Don't be afraid to experiment with different stitches and colors. You'll be amazed at how a simple edge can completely transform your project from handmade to heartfelt.
Assembling Pieces with Seamless Joins
Some of the most incredible crochet projects are built from smaller pieces, all lovingly stitched together. Just think of those vibrant granny square blankets, cozy panel cardigans, or the charming amigurumi friends that steal our hearts. This assembly is a critical crochet finishing technique where your creation finally comes to life. Getting comfortable with a few key joining methods will give you the confidence to tackle any multi-part project you fall in love with.
The real goal here is to create joins that are not just strong, but are either beautifully invisible or a deliberate, decorative feature of their own. A clean, neat seam is what elevates your work, making the finished piece look polished and intentional. It’s a quiet, mindful process that pulls all your hard work together into one stunning whole.
Setting Yourself Up for Success
Before you even think about threading your needle, the most important step is to line up your pieces perfectly. A wobbly start will absolutely lead to a wobbly seam, no matter how perfect your stitches are. Take a few extra moments to pin your pieces together or use stitch markers to hold everything securely in place.
You'll want to match your stitches one-for-one. If you’re joining two granny squares, for instance, make sure the corner spaces and the stitches along each side are perfectly aligned. This little bit of prep work ensures your final project will lay flat and look beautifully symmetrical.
The Sturdy and Simple Whip Stitch
The whip stitch is probably one of the most common and straightforward ways to sew crochet pieces together. It creates a strong, durable seam that’s just slightly raised. This makes it a fantastic choice for projects that need to be robust, like afghans, tote bags, and the structural seams of amigurumi that have to hold their shape.
To work a whip stitch, you’ll hold the wrong sides of your two pieces together. Using a yarn needle, pass your joining yarn through the matching loops of both pieces, wrapping it over the top edge in a steady, spiral motion. The real secret to a neat whip stitch is consistent tension: you don't want it so tight that it puckers the fabric, but not so loose that you can see gaps.
Your seams are the gentle threads that connect your creative journey. Give them the same care and attention you gave every stitch, and they will hold your work together beautifully for years to come.
Creating an Invisible Seam with the Mattress Stitch
When you need a completely flat and invisible join, the mattress stitch is your new best friend. Seriously, this technique is a game-changer for garments like sweaters and cardigans where you want the seams to just melt into the fabric. It’s worked from the right side of your project, which feels a little strange at first, but it gives you the perfect view of how the seam is coming together.
You'll work back and forth between the two pieces you're joining, picking up the horizontal bar between the stitches on each side.
- First, insert your needle under the bar on one piece.
- Then, move directly across and slide it under the corresponding bar on the other piece.
- After a few stitches, give the yarn tail a gentle pull, and like magic, the two pieces will draw together with no visible seam at all.
This method creates a wonderfully flexible seam that moves with the fabric, making it absolutely ideal for anything wearable.
The Flat and Strong Slip Stitch Join
If you’d rather join with your crochet hook instead of a needle, the slip stitch join is a brilliant option. This method creates a very flat, sturdy seam that leaves a slightly decorative, chain-like line on one side. It’s a popular go-to for joining granny squares right sides together, which creates a super clean finish.
You’ll hold your pieces together, either wrong sides or right sides facing, depending on the look you want, and work slip stitches through the corresponding loops of both layers. For an even flatter seam, try working through only the back loops of each piece. This technique is often faster than sewing and gives you a wonderfully secure join.
Choosing the Right Yarn for Seaming
For the cleanest possible finish, always try to use the same yarn for seaming that you used for the project itself. This ensures the color and texture match perfectly. Here's a great tip I've picked up: leave a long starting or ending tail when you finish a piece. Often, this tail is just long enough to be used for seaming, which also means one less end to weave in later!
Assembling your crochet pieces is the final, satisfying act of creation. Whether you’re building a blanket square by square or bringing an amigurumi character to life, these joining techniques will help you do it with confidence and a beautiful, professional touch.
Common Questions About Finishing Crochet
No matter how clear instructions are, questions always bubble up when you're trying something new. Think of this as our cozy little chat corner, where we’ll untangle some of the most common knots you might run into with crochet finishing techniques. My goal is to give you straightforward answers that clear things up and make you feel more confident as you put those final, loving touches on your work.
Let’s jump into those nagging questions. These are the little details that can take a project from "good" to "I can't believe I made this!"
Do I Really Need to Block Every Project?
This is probably the question I get asked most often. The short answer? No, not every single project needs to be blocked. But a whole lot of them will look ten times better if you do. Blocking really shines when you’re making something where the final shape, drape, and stitch definition are crucial.
Just picture a delicate lace shawl, a cozy sweater, or an intricate blanket. Blocking completely transforms them from a bit lumpy into a beautifully finished piece. On the flip side, something sturdy like amigurumi, which is often made with firm mercerized cotton yarn to hold its shape, usually doesn't need it.
Think about the fiber: Natural fibers like wool and cotton just adore a good soak and shaping session.
Think about the function: If you need it to lay perfectly flat or drape just right, blocking is your best friend.
When you're not sure, it’s always a fantastic skill to have in your crafting toolkit.
What Is the Most Secure Way to Weave in Ends?
The secret to a truly bomb-proof finish that will survive countless washes is to change direction. It’s all about creating friction that locks that pesky yarn tail deep into the fabric of your work, making it almost impossible for it to wiggle free.
Start by weaving the tail in one direction for about an inch on the wrong side of your project. Then, turn and weave back in the opposite direction, making sure to catch a different set of fibers. For extra security, make one last little pass in the original direction to really lock it down.
Never snip the tail right up against the fabric as soon as you're done weaving. Give the yarn a gentle tug first to let it settle into place, then trim it. This one small step prevents the end from popping out later on.
Why Does My Border Look Wavy or Ruffled?
Ah, the dreaded wavy border. This almost always means you’ve crammed too many stitches into your edge, which is a super common hiccup, especially along the sides of your rows. The fabric simply has too many stitches for the space, forcing it to ripple.
To fix this, you just need to space your stitches out more evenly. A great rule of thumb is to place one single crochet for each single crochet row and two for each double crochet row. If it still looks ruffled, pull it out and try again with fewer stitches. Using stitch markers every few inches from the get-go can also help you keep everything nicely distributed.
Can I Use an Iron to Block Acrylic Yarn?
This is a huge one, and getting it wrong can ruin your project. You should never, ever touch a hot iron directly to acrylic yarn. Acrylic is basically plastic, and direct heat will melt it in an instant, leaving it flat, shiny, and brittle. A true crafting tragedy!
But you can use steam from an iron in a method called steam blocking. First, pin your project into its final shape on a heat-safe surface. Then, hold the iron several inches above the fabric and let the steam gently float down and penetrate the fibers. That gentle heat is just enough to relax the acrylic, letting it take on its new shape as it cools.


![The Ultimate Beginner's Guide to Crochet [2026]](http://crochetree.com/cdn/shop/articles/feat-ultimate-beginners-guide-to-crochet_eae81cec-84d0-455d-b190-08cd22d826c4.jpg?v=1777713815&width=533)


