
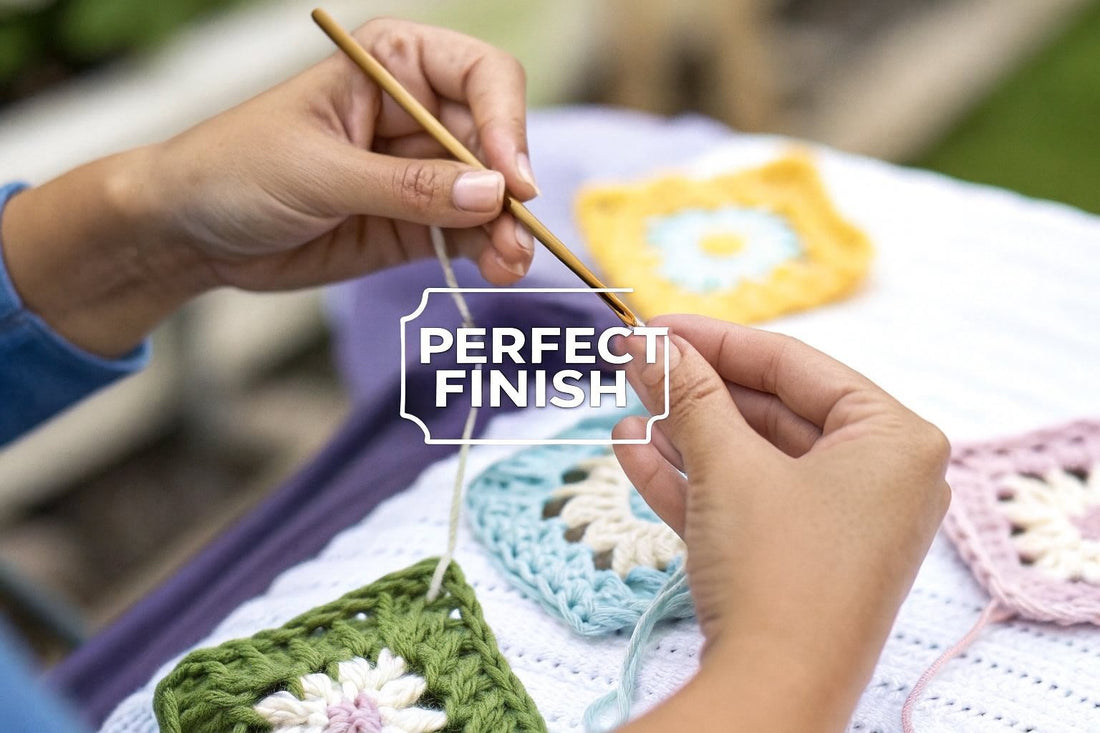
That moment when you have a pile of perfectly crocheted squares or amigurumi parts is pure magic. This is where your project truly comes to life, and learning how to sew crochet pieces together is the skill that makes it all happen. It's the final, thoughtful step that turns individual shapes into a cozy blanket or a whimsical doll you can be proud of.
Why a Flawless Finish Matters
You’ve spent hours, maybe even days, pouring your heart into each stitch. The way you join those pieces deserves just as much care. A thoughtful seam doesn't just make your work look professional; it adds strength and durability, transforming your project into a cherished keepsake.
Think of it as the final act of creation. It's that quiet, mindful moment that turns a collection of parts into a complete work of art. A clean seam is often what separates a project that looks lovingly handmade from one that looks truly polished. This guide is here to walk you through it, taking the stress out of that final assembly.
What You Will Discover
We're going to tackle this together, turning what can feel like a chore into one of the most rewarding parts of making something by hand. Let’s leave messy results behind and focus on simple, solid techniques that will boost your confidence and elevate your finished projects.
Here’s a peek at what we'll cover:
Essential Prep Work: Find out why a little bit of prep, like blocking, can make a huge difference before you even pick up a needle.
Key Stitching Methods: We’ll explore the most popular and reliable seams, so you know exactly which one to choose for any project.
Choosing the Right Tools & Yarn: The right supplies can make your sewing experience much smoother. We'll show you what you really need.
Troubleshooting Tips: Learn how to fix common hiccups so your seams always come out looking neat and secure.
A beautiful finish is more than just joining pieces; it's about honoring the time and creativity you’ve invested in every single stitch. It’s the final act of creation that makes your project whole.
This guide is designed to empower you with clear steps and encouraging tips. Whether you're assembling your very first granny square blanket or putting the finishing touches on a detailed amigurumi, you’ll find everything you need to feel confident and create something wonderful.
For a deeper look into polishing your work, our guide on crochet finishing techniques offers even more helpful insights. Now, let’s get ready to turn that pile of pieces into a finished treasure!
Preparing Your Pieces for Seamless Joining
Before you even think about threading that yarn needle, taking a few moments to prep your pieces can make all the difference. It's the secret to turning a frustrating seaming session into a satisfying one, and it’s what gives your final project that polished, professional look. Think of it as preparing a canvas before you paint. This groundwork is everything.
First things first: weave in your ends securely. I know it can feel tedious, but taking the time to weave each tail back and forth through the stitches on the wrong side is non-negotiable. This simple action prevents those pesky ends from popping out later. Trust me, you don't want a beautiful blanket or a beloved doll starting to unravel after a bit of use.
With your ends tucked away, it’s time for a true game-changer: blocking. Blocking is just a gentle way of shaping your crochet pieces using water or steam. It encourages all your stitches to relax and ensures your pieces are uniform in size and shape. When everything is perfectly aligned, the sewing process becomes so much smoother.
Why Blocking is a Must
Have you ever tried to sew two pieces of fabric together when one is slightly bigger or wonkier than the other? It’s a recipe for puckered, uneven seams. Blocking completely solves this problem.
Evens Out Stitches: It relaxes the yarn fibers, letting your stitches settle into a beautiful, consistent fabric.
Defines Shape: This is how you get granny squares that are actually square and garment panels that hang just right.
Ensures Uniformity: When all your pieces are the exact same size, lining them up for sewing becomes effortless and precise.
Steam blocking works wonders for acrylic yarns, while natural fibers like wool and cotton respond beautifully to wet blocking. Don't skip this step! It ensures your seams lie flat and gives your project a lovely, finished drape.
Choosing the Right Yarn for Seaming
The final piece of the prep puzzle is picking the right yarn for your seams. The yarn you choose can either make your seam blend in invisibly or stand out as a cool design feature.
For amigurumi, which needs strong, crisp joins to hold its shape, we recommend a smooth and durable yarn. We love using 100% mercerized cotton in fingering weight. This yarn glides through stitches easily, holds knots tightly, and creates clean, sturdy seams that can handle plenty of play and cuddles.
For other projects like blankets or garments, you have more options! Consider the project's needs:
Acrylic: Budget-friendly and washable, great for blankets (but can sometimes pill).
Cotton Blends: Breathable and easy to care for, perfect for wearable items or homewares.
Wool/Wool Blends: Offers wonderful warmth and elasticity, ideal for sweaters and hats (be mindful of care instructions and skin sensitivity).
Actionable Tip: For an invisible seam in any project, use the exact same yarn you crocheted with. This guarantees a perfect color match and ensures the seam will stretch and wash just like the rest of the fabric.
Once you have these foundational steps sorted, you’re ready to start sewing your beautiful crochet pieces together.
Mastering the Whip Stitch for Sturdy Seams
The whip stitch is a crafter's classic for a reason. It’s a wonderfully simple technique that creates a strong, neat seam, making it a fantastic skill to master as you figure out how to sew crochet pieces together. I always reach for this method on projects that need to be extra durable (think amigurumi toys destined for lots of cuddles or granny square blankets that will become family heirlooms).
Unlike invisible seams, the whip stitch creates a visible, raised edge that can actually be a subtle design element. Its real beauty is in its simplicity and reliability. You’re essentially just wrapping, or "whipping," your yarn around the edges of two pieces to pull them together securely. Let’s walk through how to create this beautifully sturdy seam with confidence.
Aligning Your Pieces Perfectly
Before you even thread your needle, getting your pieces aligned is the most important step. Lay your two crochet pieces next to each other with the right sides facing up. If your project has a clear front and back, decide now if you want the seam visible on the outside or tucked away on the inside. For most of my projects, I work with the right sides facing me.
Take a moment to carefully line up the stitches along the edges you plan to join. This is especially important for things like granny squares or striped panels where you need the patterns to flow perfectly. Using stitch markers or clips every few inches is a huge help here; they hold everything in place so you can just focus on stitching.
The Stitching Process
Now for the fun part. Thread your yarn needle, leaving a nice long tail for weaving in when you’re done. To start, just insert your needle from back to front through the very first stitch on both pieces of fabric. Pull the yarn through, leaving that tail, and tie a secure knot to anchor your seam.
From here, it’s all about finding a simple, calming rhythm:
Insert the Needle: From the back, push your needle through the next stitch on both pieces.
Pull the Yarn: Gently pull the yarn all the way through, letting the loop wrap over the top edge of the fabric.
Maintain Tension: The key here is consistency. Each stitch should be snug enough to hold everything together, but not so tight that it makes the fabric pucker.
Repeat: Just keep going! Continue this motion, inserting from back to front through both pieces, all the way down the seam.
Actionable Tip: For an extra-strong seam, pass your needle through both loops of the stitch on each piece. If you want a seam with a little more flexibility and a flatter look, try working through only the back loops of the stitches instead.
Once you reach the end, make another secure knot and weave the remaining tail back through your new seam to hide it. With a little practice, the whip stitch will become second nature, giving you a tidy and reliable way to assemble your beautiful creations.
Creating Invisible Seams with the Mattress Stitch
For those times when you want a seam to disappear completely, the mattress stitch is your new best friend. It creates a flat, invisible join from the right side of your work, making it the perfect choice for garments, color-blocked blankets, and any project that needs a truly seamless look.
This technique is a little bit of crafting magic that will instantly elevate your projects.
The secret behind this stitch lies in working back and forth between your two pieces. Instead of sewing over the edges, you'll be picking up the horizontal bars of yarn that sit between the stitches. This creates a hidden "ladder" of yarn on the wrong side. When you gently pull, the two pieces cinch together perfectly, and the seam vanishes.
Executing the Perfect Mattress Stitch
To get started, lay your two crochet pieces side-by-side with the right sides facing up. Thread your yarn needle and anchor your yarn at the very beginning of the seam with a small, secure knot on the wrong side.
Now, you can start creating that magic ladder. Here’s how you’ll move between the pieces:
- On the first piece, slide your needle under the first horizontal bar between the edge stitch and the next one in.
- Move to the second piece and do the same, picking up the corresponding horizontal bar directly across from the first.
- Continue this pattern, alternating from side to side. Your yarn will form a zigzag pattern between the two edges.
After every few stitches, gently pull on your working yarn. You’ll see the pieces draw together, and the seam will become invisible. It’s so satisfying to watch!
The key to a beautiful mattress stitch is relaxed tension. You only need to pull the yarn enough to close the gap. Pulling too tightly will cause the fabric to pucker and bunch up.
Tips for Seamless Success
Keeping your tension just right is the most important part of mastering this stitch. It should feel smooth and easy, never forced. When done correctly, this technique makes your work look like one continuous piece of fabric. It’s also incredibly flexible, making it ideal for sweater seams that need to move with you.
This invisible seaming method is quite different from creating a firm join on a three-dimensional piece. For more on that, you can explore our guide on how to join crochet rounds for amigurumi and other circular projects.
Other Essential Joining Techniques to Explore
Once you get comfortable with the whip and mattress stitches, you start to see just how many creative options you have. Those are your workhorses, but other techniques can add unique textures and decorative flair to your projects. Learning them gives you the freedom to choose a join that doesn't just hold your work together but actually enhances its design.
One of my favorite alternatives is the slip stitch join. Instead of using a yarn needle, you’ll work this one with your crochet hook. It creates a sturdy, raised seam that looks like a neat little braid. It’s a fantastic choice for projects where you want the seam to be a visible, decorative element. Think afghan blocks or the edges of a throw pillow. It provides a crisp, defined line that adds a ton of structure and style.
Decorative and Functional Joins
Another beautiful option is the flat braid join. This method is perfect for connecting motifs like granny squares because it creates a lacy, openwork seam between them. It’s an elegant way to add a bit of breathing room to a design, making it a wonderful choice for lightweight blankets or shawls. It might look intricate, but it’s a surprisingly rhythmic and enjoyable process once you find your groove.
Knowing these different ways of how to sew crochet pieces together empowers you to make thoughtful design choices. For more complex assemblies, like attaching a doll’s head, you may even need to combine a few techniques. Our detailed guide on how to sew the head to the neck on Crochetree dolls dives deep into the specifics for those crucial structural joins.
Choosing your joining method is an artistic decision. Think about whether you want your seam to be a quiet supporter or a beautiful focal point of your finished piece.
Common Questions About How to Sew Crochet Pieces Together
Even with a great tutorial, you'll probably have a few little questions pop up while you're right in the middle of a project. I know I always do! Getting those small details sorted is what builds real confidence.
Here are a few answers to the questions we hear most often about how to sew crochet pieces together. Hopefully, they’ll help you troubleshoot on the fly and get that flawless finish you're after.
What Kind of Yarn Is Best for Seaming?
For a nearly invisible seam, your best bet is almost always the exact same yarn you used for your project. This guarantees a perfect color match and ensures the seam will wash and wear just like the rest of the piece.
If your project yarn feels a bit thick for sewing, you can often split the plies (the individual strands twisted together) to get a thinner, less bulky strand. For amigurumi, a smooth, strong yarn like mercerized cotton works beautifully because it holds tight without snagging and adds durability.
The general rule is to match the fiber so everything wears consistently. Use cotton yarn for a cotton project, for instance. Avoid using standard sewing thread; its thin, sharp nature can actually cut through your soft yarn fibers over time.
How Do I Stop My Seams from Puckering?
Puckering is almost always a sign that your sewing tension is a bit too tight. The goal is to create stitches that are just snug enough to hold the pieces together without pulling or distorting the crochet fabric.
When you're using the mattress stitch, for example, just gently pull the yarn until the edges meet, but no tighter. If you're doing a whip stitch, try to make each stitch with the same amount of slack as the one before it.
My favorite trick is to use clips or pins to secure the pieces together every few inches before I even start sewing. This simple step prevents you from accidentally stretching one side more than the other, which is another common cause of puckering.
Which Seaming Method Is the Strongest?
If you need a really durable join for a project that's going to get a lot of love, the whip stitch and the slip stitch join are your most reliable options. The whip stitch wraps securely around the edges, making it a fantastic choice for toys and well-used blankets.
The slip stitch join, which you create with a crochet hook instead of a needle, forms a very sturdy, chain-like seam with almost no stretch. This makes it incredibly strong. While the mattress stitch is plenty durable for most things like garments, these other two methods are superior for items that will be under more strain.
Knowing these skillful joining techniques is key as the crochet market sees a rising interest in customized apparel that needs to be both beautiful and durable.
At Crochetree, we believe that finishing your project should be just as joyful as crocheting it. With these techniques and a little practice, you'll be creating beautiful, lasting seams that honor all the love you put into your work. Be patient with yourself, enjoy the process, and take pride in bringing your creation to life. Happy crafting!


![The Ultimate Beginner's Guide to Crochet [2026]](http://crochetree.com/cdn/shop/articles/feat-ultimate-beginners-guide-to-crochet_eae81cec-84d0-455d-b190-08cd22d826c4.jpg?v=1777713815&width=533)


