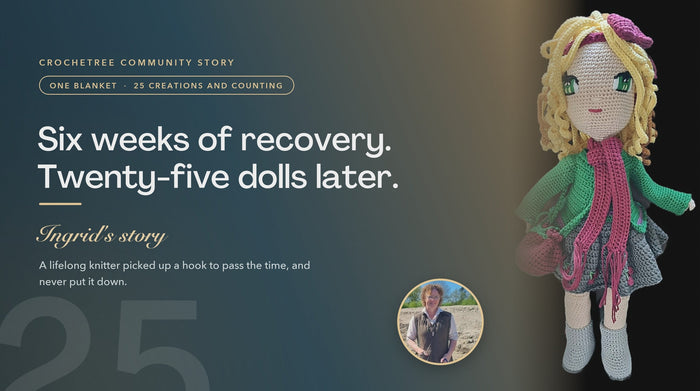
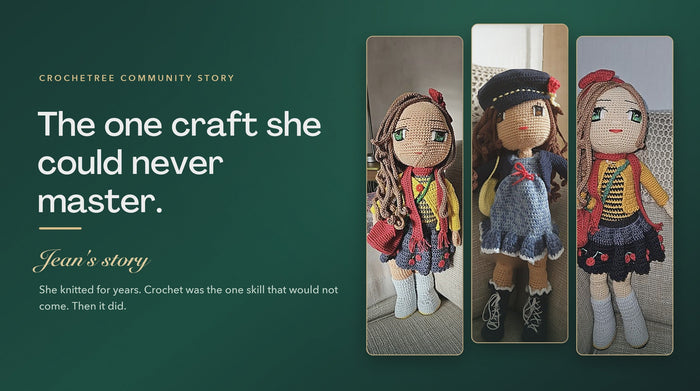
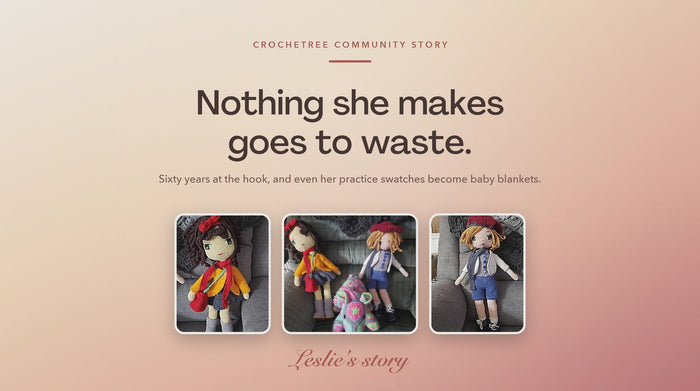
Ask anyone what they notice first about a Crochetree doll and you will almost always hear the same two answers: the eyes, and the hair. Those long golden waves, rainbow corkscrew curls, and soft silver strands are what turn a crocheted head into a character with personality.
Here is the surprising part: all of that hair, every single lock, is crocheted as one single piece. No knotting strands one by one. No gluing. Just one clever flat wig that you sew on once. And the few yarn ends you create when changing hair colors? They simply hide between the wig and the head, so there is no weaving in while you make it.
In this guide we will show you exactly how our doll wigs are constructed, how one small change turns straight locks into bouncy corkscrew curls, and the little sewing tricks that make the difference between hair that looks homemade and hair that looks amazing.
The Big Secret: A Crochet Doll Wig Is One Single Piece
If you have never seen a crochet doll wig before it is sewn on, it is a strange and beautiful thing. Worked flat, it looks like a flower or a sunburst: a small crocheted circle in the middle, with dozens of long locks radiating out in every direction.

The construction is beautifully simple, and our patterns build it in one of two ways. Both start exactly like the head does, with a magic ring and six single crochets, and both rely on the same clever trick: every stitch of the wig has a front loop and a back loop, and only one of them is needed to build the cap. The other loop is left free, and that free loop is where the hair grows.
Method 1: Cap and Locks Together
This is how dolls like Louise and Iris are made. The rounds alternate between two jobs as you go:
- One round builds the cap: the same increases you use on the head, worked into the back loops, so the circle keeps growing to fit the curve of the head.
- The next round makes the hair: worked into the free front loops, each repeat chains far out and crochets back down, sprouting another long lock.
Cap round, lock round, cap round, lock round: the wig and the hair grow together, and by the last round the circle is covered in locks.
Method 2: Cap First, Locks After
Granny Grace and some of our other characters take the other road. Here you crochet the entire cap first, as a plain circle worked through one loop only, so it looks like a tiny beanie when it is done. All the unused front loops stay free, waiting in neat rings.
Then comes the fun part: you go back and work the locks of hair into those free loops, one round at a time, starting near the edge of the cap and spiraling in toward the crown. It feels a little like giving a haircut in reverse, watching a bald little cap grow a full head of hair.
Whichever method your pattern uses, the result is the same: a wig with dozens of locks, every one of them anchored into the same solid piece. Nothing can shed, snag out, or unravel, which matters a lot if the doll is destined for small hands.
The Anatomy of a Hair Lock
Every lock of hair follows the same rhythm: chain out to the length you want, then turn and crochet back down the chain, starting in the second chain from your hook. In our patterns the trip back down is usually worked in half double crochet, which gives each lock a smooth, slightly rounded look, like a strand of styled hair rather than a piece of string.
The length of the starting chain is what controls the hairstyle:
| Starting Chain | The Look | You'll See It On |
|---|---|---|
| Around 40 chains | Shorter, tidy hair with gentle movement | Granny Grace's silver hair |
| 50 to 60 chains | Mid-length hair with visible flow | Shorter locks framing the face |
| 70+ chains | Long, dramatic, waist-length hair | Louise's golden waves |
And here is a professional touch straight from our patterns: the locks are not all the same length. In Louise's wig, the final round mixes chains of 65, 76, and 78, and stitch markers show you exactly where the longer locks belong so they fall beside the face. That small variation is what makes the finished hair look styled instead of uniform.

The Secret to Corkscrew Curls
So how do you get from smooth locks to the bouncy spiral curls you see on dolls like Iris? One word: increases.
When you crochet back down the chain with one stitch per chain, the lock lies flat. But if you work two half double crochets into each chain, you are packing twice as much fabric onto the same foundation. All that extra fabric has nowhere to go, so the lock twists itself into a perfect corkscrew, completely on its own. No curling irons required.

Even better, you can decide where the curl happens. In the Iris pattern, each lock works increases into the first 30 chains and plain stitches into the rest. The result: smooth hair near the roots that breaks into playful spirals toward the ends, exactly like naturally curly hair. Want tighter, springier curls from root to tip? Work increases all the way along. Want just a flip at the ends? Increase only for the last few chains.
Blending Colors Like a Hairdresser
Real hair is never just one flat color, and the most eye-catching doll hair is not either. The technique in our patterns is simple: change yarn color every few locks, and do not cut the old yarn. Just let it rest and pick it up again a few locks later.

Two of our favorite examples sit at opposite ends of the spectrum:
- Granny Grace alternates two shades of gray, switching at the end of each lock round. The interwoven light and dark strands read as natural salt-and-pepper silver.
- Iris rotates through yellow, pink, blue, and purple every few locks, and because the colors are distributed around the whole wig, the rainbow looks blended rather than striped.
The same trick works for subtle looks too. Try two shades of blonde or brown for sun-kissed highlights, or add a single streak of a bold color for personality.
And when you do end up with yarn tails from the color changes, do not reach for your tapestry needle. There is no weaving in here: the tails all sit on the wrong side of the wig, so once it is sewn on, they are hidden between the wig and the head where nobody will ever see them.
Sewing the Wig On (Where Doll Hair Is Won or Lost)
You can crochet a flawless wig and still end up with odd-looking hair if it goes on crooked. The good news: a few habits from our patterns make placement almost foolproof.
1. Pins first, needle second
Never sew a wig straight on. Position it, then pin it generously: around the cap, and anywhere a lock needs to stay put. Step back, look at the doll from the front, the sides, and the back, and only pick up the tapestry needle when you love what you see. Moving a pin takes two seconds. Moving a sewn wig does not.
2. Find your landmarks
In the Granny Grace pattern, you lay a strand of yarn over the head to mark the center front and center back, then align the middle back of the wig with the middle back of the head. Some of our dolls, like Louise, give you an even easier landmark: the head is worked with a golden "cap" at the crown, and its color change line shows exactly where hair should sit.
3. Sew to a round, not to a guess
The wig's last round is sewn to a specific round of the head, so the hairline lands at the same height all the way around. Sew through the wig's leftover back loops and you get a strong, nearly invisible seam.
4. Style the part
Want a side part like Louise's? Sew the wig slightly off-center instead of straight down the middle, then bring a few front locks across to cover the center of the spiral. It instantly reads as styled hair.
5. Anchor the locks around the face and back
Loose locks in front of the eyes will annoy you forever. Our patterns anchor them precisely: count down from the outer corner of each eye, mark the spot with a pin, and tack the framing locks there. Then arrange the back locks between your pins and sew them down so the head keeps its shape through years of play and hugs.

Five Quick Tips Before You Start
- Go up half a hook size for the hair. Our dolls' heads are worked tightly on a 2.0 mm hook so no stuffing shows, but the wigs use a 2.5 mm hook so the locks stay soft and drape beautifully.
- Always start in the second chain from your hook when you turn to work back down a lock. It keeps the tips neat.
- Join and chain 1 after every lock round before starting the next. It keeps the spiral tidy and your stitch count honest.
- Use stitch markers whenever a round mixes lock lengths, so the long locks end up exactly where they should frame the face.
- Leave a long tail when you fasten off the wig. You will use it for sewing, and running out of tail halfway around a head is a special kind of heartbreak.
Ready to Crochet Some Fabulous Hair?
The best way to learn is to make a doll whose hair teaches you the technique. Louise is the classic place to start, with long golden locks and a step-by-step photo tutorial for the whole wig. If you are ready for curls, Iris Unicorn will teach you corkscrew spirals and rainbow color blending in one gorgeous project. And Granny Grace shows you how two simple shades of gray become the most realistic silver hair you have ever crocheted.
Brand new to crochet? Our Crochet Basics Beginner Course covers every stitch these wigs use, step by step. And the Crochetree cotton yarn we design with is exactly what makes those locks crisp and those curls springy.
One chain at a time, one lock at a time, you can craft this.
Frequently Asked Questions
How is hair attached to a crochet doll?
In well-designed patterns, the hair is not attached strand by strand. The entire head of hair is crocheted as one flat wig, a spiral disc where every lock grows out of the same piece. The finished wig is then pinned onto the head and sewn on in one pass with a tapestry needle, which makes it secure, tidy, and much faster than knotting individual strands.
How do you crochet curly doll hair?
The secret is increases. Each lock starts as a simple chain, and you crochet back down it. One stitch per chain gives you a straight lock. Two half double crochets into each chain pack in extra fabric that has nowhere to go, so the lock twists itself into a corkscrew curl. Working increases along only part of the chain gives you curls at the ends with smoother hair near the roots.
What yarn is best for crochet doll hair?
The same soft cotton yarn you use for the rest of the doll. Cotton has beautiful stitch definition, so every lock looks crisp, curls hold their spiral shape, and the colors stay vivid. Working the hair with a slightly larger hook than the head keeps the locks soft and drapey instead of stiff.
Do I have to attach doll hair strand by strand?
No. The strand-by-strand method exists, but it is slow, hard to secure, and easy to pull out. The wig method used in Crochetree patterns creates all the locks as part of one connected piece, so there is nothing to knot and nothing to shed. You crochet one flat wig, pin it in place, and sew it on once.