
Blocking is a gentle secret that transforms your crochet work from "homemade" to "handmade." It's that final, almost magical step where you use a bit of moisture to persuade the yarn fibers to relax, settle down, and show off their true beauty. This simple process is what defines your stitches, evens out any tension wobbles, and gives your project that polished, professional look you’ve been dreaming of.
What Blocking Unlocks for Your Crochet
Have you ever finished a gorgeous granny square blanket, only to realize the squares are all slightly different sizes? Or poured your heart into a delicate lace shawl, but the beautiful details are all bunched up and hidden? This is exactly where learning how to block crochet becomes your superpower.
Think of it as a spa day for your yarn. It’s a quiet, mindful moment that honors all the time and love you've put into your creation. This isn't just for experts, it's an easy, beginner-friendly skill that will dramatically improve your work. It’s the key to turning your hard work into a truly finished piece you can be proud of.
The Magic of a Polished Finish
The before-and-after difference with blocking can be truly stunning. It’s that final touch that makes your stitches bloom and your fabric drape just right. Honestly, it’s what gives handmade items that heirloom quality.
Even Stitch Definition: Blocking relaxes the yarn, letting each stitch settle into its proper place. The result is a much more uniform and clearly defined texture.
Perfect Dimensions: This is how you get your project to match the measurements in the pattern. It's crucial for garments, accessories, and blankets that need to be a specific size.
Enhanced Drape: For pieces like shawls, scarves, and cardigans, blocking is what creates that soft, flowing drape that makes them so elegant and comfortable to wear.
Crisp Edges: It’s a fantastic way to get those neat, straight edges. If you're working on something where clean lines are important, our guide on how to crochet straight edges has some great tips that work beautifully with blocking.
Blocking is an act of mindfulness. It’s a quiet moment to appreciate your work, smooth out the imperfections, and prepare your creation to be shared and loved. It’s the final breath of life you give your project.
Ultimately, taking the time to block your work is an expression of care. It ensures that the scarf you gift will wrap warmly, the blanket you made will lay smoothly on the bed, and the amigurumi you created will stand up proudly. It’s the difference between a project that’s just done and one that is truly complete.
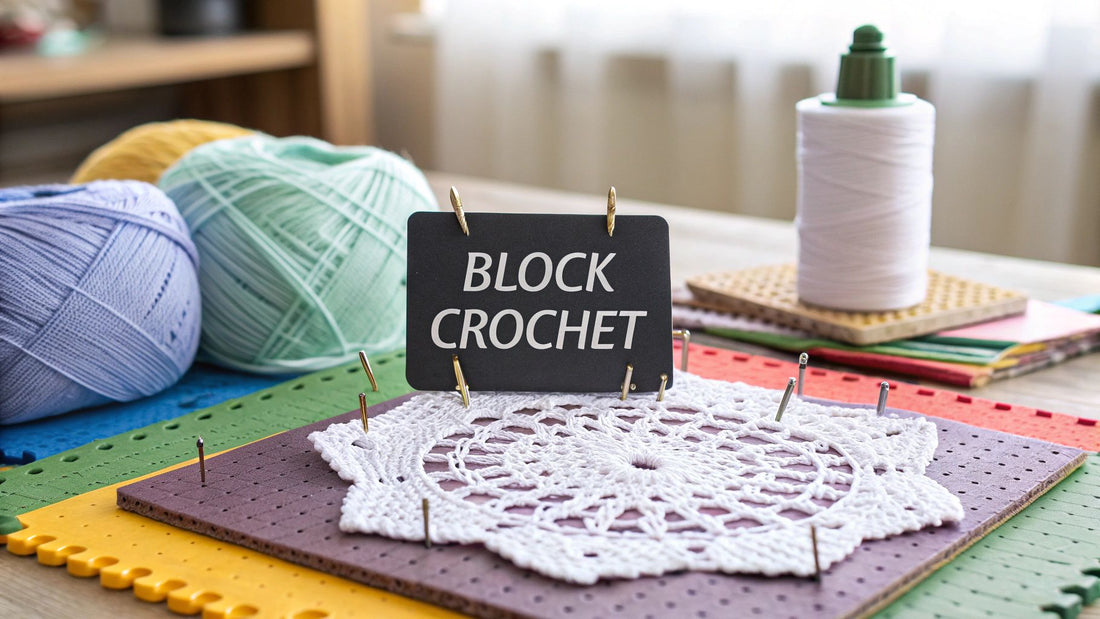
Gathering Your Essential Blocking Tools
Getting ready to block your beautiful crochet work doesn't require a huge collection of expensive gadgets. The good news is, you probably have a few of these items around your home already. Let's walk through the simple, essential tools that will help you achieve that perfect, polished finish.
At its core, blocking is wonderfully straightforward. You just need a surface to pin your project onto, something to hold it in place, and a way to introduce moisture. This simple trio is the foundation of any blocking setup.
The Must-Have Items
Before you start, gather these key supplies. Having them ready makes the process feel calm and mindful, turning this final step into a truly enjoyable part of your crafting journey.
Blocking Mats: These are firm foam squares, often interlocking like puzzle pieces, that give you a sturdy, pin-able surface. They're great for protecting your tables or floors and usually have a grid for precise measurements.
Rust-Proof T-Pins: This is crucial. You must use rust-proof pins, like stainless steel T-pins. Regular sewing pins can rust when wet, leaving permanent stains on your precious project.
Spray Bottle or Basin: For spray blocking, a simple spray bottle that produces a fine mist is perfect. If you're wet blocking, you'll just need a clean sink or a basin.
Clean Towels: Grab a couple of thick, clean towels. You’ll need them to gently blot excess water from your project without any harsh wringing or stretching.
You don't need to buy specialized equipment right away. A set of children's foam play mats or even a clean, flattened yoga mat can work wonderfully as a blocking surface when you're just starting out.
The tools you reach for can also depend on the yarn you've used. For instance, projects using natural fibers like wool and cotton often benefit from wet-blocking tools like basins and towels. Meanwhile, pieces made with acrylic yarn are commonly steam-blocked to achieve the best results.
Here's a quick look at the essentials and some clever workarounds if you're on a budget.
Essential Blocking Tools and Alternatives
|
Essential Tool |
Purpose |
DIY Alternative |
|---|---|---|
|
Blocking Mats |
A pin-able, water-resistant surface with a grid for alignment. |
Children's play mats, a yoga mat, a flattened cardboard box covered in a towel. |
|
Rust-Proof Pins |
Securing the project in place without leaving rust stains. |
Stainless steel T-pins are best, but rust-proof sewing pins can work in a pinch. |
|
Spray Bottle |
Applying a fine, even mist of water for spray blocking. |
Any clean spray bottle from around the house will do. |
|
Basin or Sink |
Submerging the project for wet blocking. |
A clean bucket or a large, clean mixing bowl. |
|
Towels |
Gently absorbing excess water from a wet-blocked item. |
Any clean, thick bath towels. Avoid ones that shed lint. |
This table shows just how accessible blocking can be, no matter your budget.
Optional Tools for an Extra-Sharp Finish
Once you're comfortable with the basics, a few extra tools can make achieving perfectly straight edges even easier. These are especially helpful for larger items like shawls and blankets.
Blocking Combs: These are small tools with multiple sharp pins set in a row. They're fantastic for pinning out long, straight edges quickly and ensuring you get even tension all the way along the border.
Blocking Wires: These flexible wires are a total game-changer for lace shawls. You thread them through the edges of your project, allowing you to create flawless straight lines or gentle curves with just a few pins.
With these simple tools in hand, you’re fully prepared to give your crochet project the beautiful, professional finish it deserves.
Matching the Blocking Method to Your Yarn Fiber
The golden rule of blocking is to honor the yarn you've chosen. Just like different plants need different amounts of sun and water, every yarn fiber reacts uniquely to heat and moisture. Picking the right blocking method isn’t just about getting a good result, it’s about protecting the beautiful project you’ve poured your heart into.
This is the key to learning how to block crochet successfully. Natural fibers like wool and cotton love soaking up water, which lets their fibers relax completely so they can be gently reshaped. On the other hand, synthetic fibers like acrylic don’t absorb water, so a simple soak won’t do much. For them, it’s all about gentle heat, which softens them just enough to set their new shape.
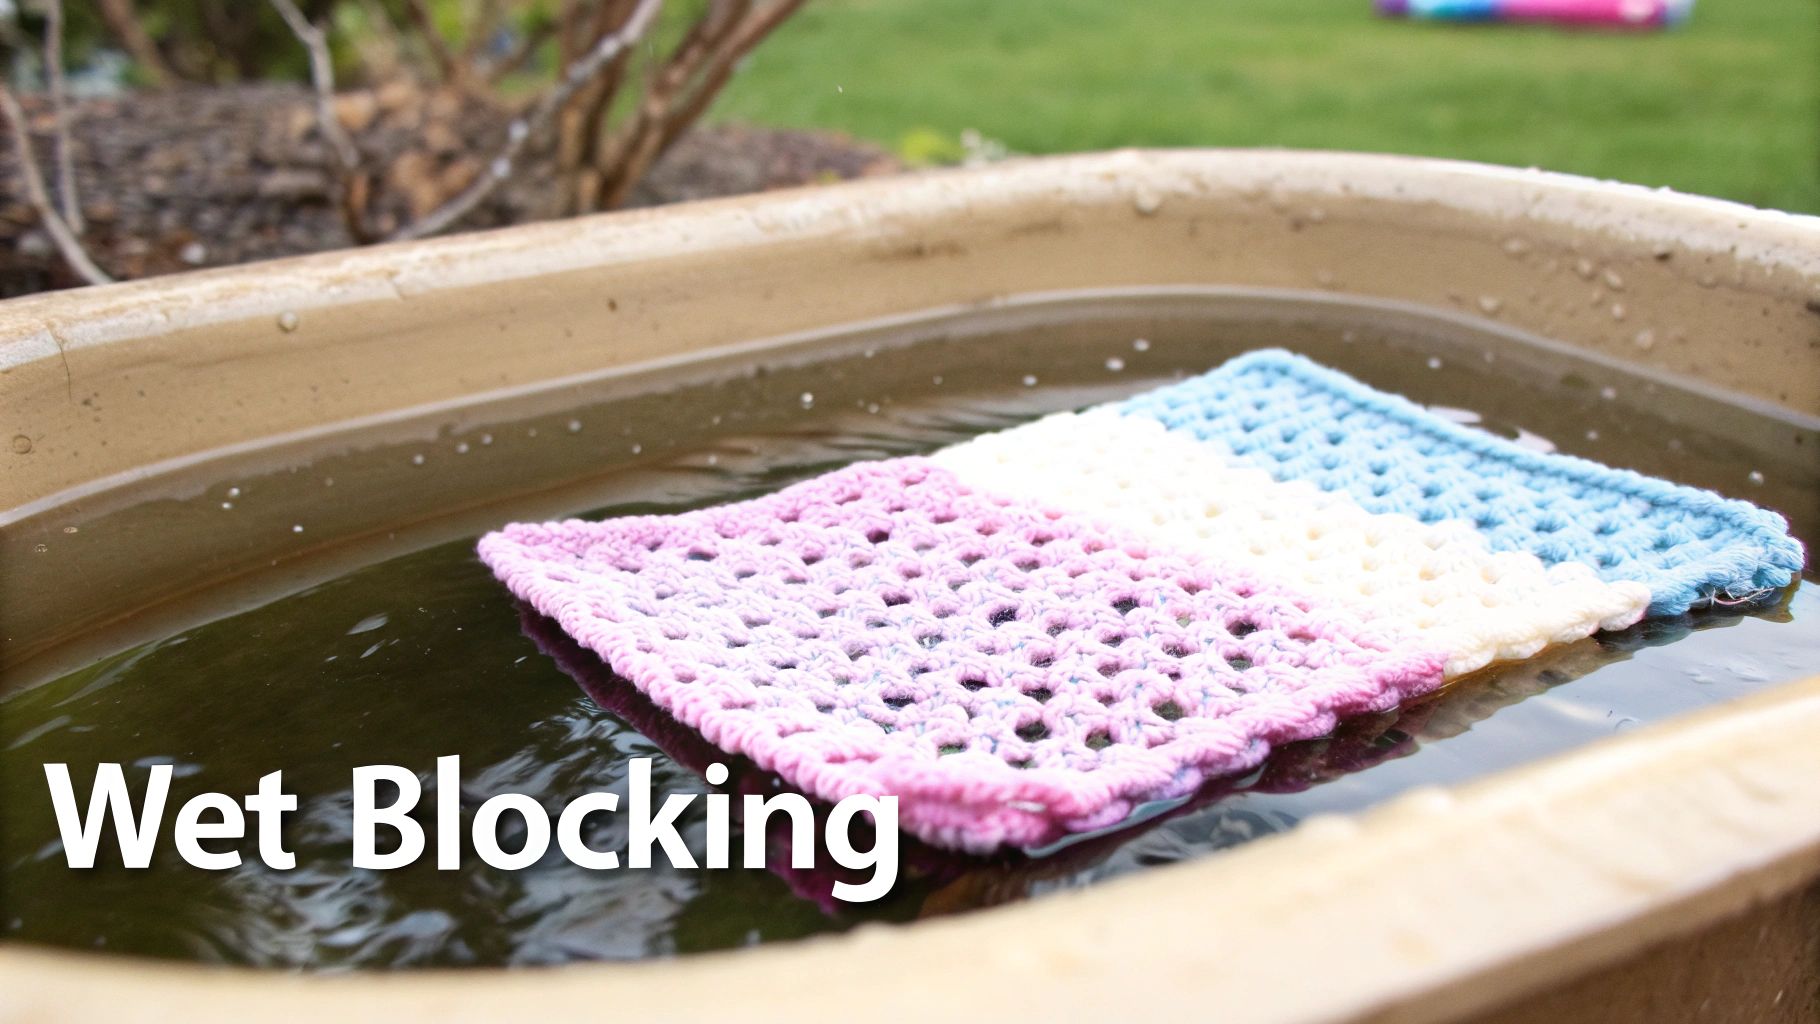
Wet Blocking for Natural Animal Fibers
Wet blocking is the most intensive method, but it can deliver truly transformative results for natural animal fibers. This is the go-to choice for projects made with wool, alpaca, merino, or other non-superwash animal hairs. These fibers have a natural memory and elasticity that is fully unlocked with a good soak.
This process involves completely submerging your project in lukewarm water, letting every fiber become saturated. This full immersion allows the stitches to totally relax, releasing any uneven tension and letting the fabric be shaped precisely as it dries. It’s perfect for lace shawls that need to be stretched open or garments that have to hit exact measurements.
Steam Blocking for Acrylic and Synthetics
Steam blocking is your best friend for acrylic, nylon, and other synthetic yarns that don’t respond to being soaked. Because these fibers are man-made, they won’t change shape with water alone. Instead, you need a little heat from steam to relax and set the stitches into place.
A Gentle Reminder: When you're steam blocking, never let the hot iron or steamer touch your yarn directly! This can “kill” or even melt the fibers, which permanently flattens them and ruins the texture. Always hover the steam source an inch or two above your project.
This method is fantastic for that budget-friendly acrylic blanket or a durable cotton-blend sweater. It gently coaxes the stitches into place without the risk of damage, giving your project a much more polished and professional look.
Spray Blocking for Delicate Fibers and Quick Fixes
Spray blocking is the lightest touch of all three methods. It’s a wonderful option for delicate fibers like silk and bamboo that might be too fragile for a full, heavy soak. It's also great for projects that just need a little encouragement to lay flat, like cotton dishcloths or granny squares that are already mostly in shape.
For this technique, you’ll pin your dry project to your desired dimensions first, then use a spray bottle to mist it with water until it's damp but not dripping wet. Because it uses less water, it’s a much quicker process from start to finish.
Understanding these differences is the first step. If you're curious to learn more about different fiber types, our guide on choosing the perfect yarn for your crochet project offers even more helpful insights.
Your Guide to Each Blocking Technique
Alright, now that you know which method is the best match for your yarn, it's time to get hands-on. This is where the real magic happens! Let’s walk through each technique together. Remember, this is a gentle, mindful process—so take a deep breath, and let’s give your creation the beautiful finish it truly deserves.
The Full Soak of Wet Blocking
Wet blocking is a deeply satisfying process, especially for natural animal fibers like wool or alpaca. This method fully relaxes the yarn, giving you amazing precision to reshape your project exactly how you want it.
First, fill a clean basin or sink with lukewarm water. Submerge your project completely and let it sit for about 20-30 minutes, allowing the water to penetrate every fiber.
Once it's soaked, carefully lift your project out, supporting its full weight so it doesn’t stretch. Gently squeeze the excess water out, never wring or twist your crochet. A great trick is to roll it up in a thick towel and press down firmly to absorb most of the moisture.
From there, lay your damp project on your blocking mats, pin it to your desired dimensions, and let it air dry completely. It takes patience, but the results are worth it.
The Gentle Touch of Steam Blocking
Steam blocking is perfect for acrylic and other synthetic fibers. Since these yarns don't respond to water alone, a little controlled heat from steam is what coaxes the stitches to relax and set into their final shape.
Start by pinning your dry project onto your blocking mats, gently stretching it to the correct size and shape. Now, grab your steamer or an iron with a good steam function. This next part is incredibly important: hover the steamer or iron about an inch or two above the surface of your work.
Do not let the hot metal touch the yarn directly! Direct contact can melt, or "kill," acrylic fibers, leaving them permanently limp and shiny. Think of it as giving your project a warm, gentle sauna, not putting it on a hot press.
Move the steam source slowly and evenly across the entire piece. You'll actually see the fibers visibly relax as you go. Once you're done, just leave it pinned until it's completely cool and dry to the touch.
This handy infographic breaks down the core steps for a quick visual reminder.
As you can see, the key is all about indirect heat followed by a cooling period, which safely sets the stitches without causing any damage.
The Quick Refresh of Spray Blocking
Spray blocking is the fastest and most delicate of the three methods. It’s perfect for projects made from fine fibers like silk or bamboo. It’s also great for items that just need a little encouragement to lay flat, like cotton coasters or a batch of granny squares.
Just like with steam blocking, you'll start by pinning your dry project to the mats. Arrange it exactly how you want the finished piece to look.
Next, take a spray bottle filled with clean water and mist your project until it's evenly damp. You're not trying to soak it, just get it moist enough to relax. Let it air dry completely before you unpin it. It’s a wonderfully simple way to add that crisp, professional look with minimal fuss.
Mastering these methods is one of the most rewarding parts of making beautiful handmade items. If you're ready to build your skills even further, you can explore more crochet finishing techniques to take your work to the next level.
Pro Tips for a Picture-Perfect Finish
Once you've got the hang of the basic blocking methods, you can start using a few extra tricks that really make your projects sing. These are the little secrets that take your work from "handmade" to "handcrafted," giving you the confidence to tackle anything from delicate lace shawls to charming 3D creations.
This finishing step is highly valued among seasoned crafters. Many advanced makers block their items regularly to get that polished, professional look, especially for garments and intricate lacework. It’s a clear sign of how much this final touch matters in the crafting world.
Handling Unique Project Shapes
Not everything we crochet is a flat square! For things like amigurumi, hats, or bags, blocking can be the key to getting a clean, well-defined structure.
- For Amigurumi: For amigurumi, we recommend using 100% mercerized cotton in a fingering weight. This yarn type provides excellent shape retention, stitch clarity, and durability. Before stuffing, try giving the individual pieces a light steam block. This helps even out the stitches and makes the final assembly much easier.
- For Hats: A balloon is your best friend here. Just inflate it to the right head size, mist your finished hat with water, and pop it over the balloon to dry. It creates the perfect form for a beanie or cloche.
Achieving Perfectly Straight Edges
That impressive, ruler-straight edge you see on high-end blankets and shawls often comes from blocking wires. They are an absolute game-changer.
Instead of fighting with dozens of T-pins, you simply thread a flexible wire through the very edge of your project. This lets you pull an entire side perfectly taut with just a few pins, giving you a flawless line with minimal fuss.
Don’t have blocking wires? In a pinch, you can carefully use clean knitting needles for a similar effect on smaller projects. Just make sure whatever you use is rust-proof!
Working with Mixed Fibers or Mystery Yarns
We've all been there: you've got a gorgeous yarn blend, or you’ve lost the label to a skein from your stash. When you don't know the exact fiber content, the golden rule is to always use the most delicate fiber's blocking method.
For a wool-acrylic blend, for instance, you'd want to use steam blocking. While wet blocking is great for wool, only the gentle heat from a steamer is safe for the acrylic part. When in doubt, your gauge swatch is your test subject. Always try your chosen method on it first to see how the yarn reacts before committing to the whole project.
Common Blocking Questions Answered
Even after you've learned the basics, a few questions always pop up. It's totally normal! Let's clear up some of those common wonders so you can block with confidence.
Do I Really Have to Block Every Crochet Project?
This is the number one question we hear. The honest answer? No, not every single project needs blocking. Things like sturdy cotton baskets or tightly stuffed amigurumi dolls usually hold their shape just fine on their own.
But for almost everything else, blocking is where the magic happens. If you want better drape, crisp stitch definition, or need your project to hit specific measurements, blocking is essential. Garments, shawls, and blankets are all completely transformed by this final step. A good rule of thumb is: if it needs to lay flat, hang beautifully, or fit perfectly, blocking will make a world of difference.
Can I Ruin My Project by Blocking It?
It's completely understandable to feel a little nervous about soaking and pinning a project you’ve spent hours on. The biggest risk really comes down to using the wrong method for your fiber.
The main culprit is putting direct heat on acrylic yarn. If a hot iron touches acrylic, it can "kill" the fiber, leaving it limp and shiny, and sadly, this is irreversible. But don't let that scare you! As long as you stick to the right method for your yarn, gentle steam that hovers over acrylics, a nice long soak for natural wools, you’ll be golden. When in doubt, always test your method on your gauge swatch first.
How Long Does My Project Need to Dry?
While the active part of blocking is pretty quick, the drying phase is all about patience. Your project is ready when it is 100% dry to the touch, all the way through to the core.
This could take just a few hours for a delicate lace project, or it could take a day or two for a thick, wet-blocked wool blanket. The time really depends on your yarn's thickness, the blocking method you used, and even the humidity in your home.
Resisting the urge to unpin your project while it’s still even slightly damp is key. Removing it too early will undo all your beautiful work, as the fibers haven’t had a chance to set in their new shape.
Trust me, letting it dry completely is worth the wait. You’ll be rewarded with a flawless, professionally finished piece that truly honors all the time and love you poured into it.


![The Ultimate Beginner's Guide to Crochet [2026]](http://crochetree.com/cdn/shop/articles/feat-ultimate-beginners-guide-to-crochet_eae81cec-84d0-455d-b190-08cd22d826c4.jpg?v=1777713815&width=533)


