
Welcome to one of the most magical moments in making amigurumi, bringing your creation to life with the perfect gaze! Amigurumi safety eyes are small plastic posts, often with colorful pupils, that you secure from the inside with a special locking washer. For many crafters, they’re the go-to for giving handmade dolls a durable, professional finish that instantly sparks personality.
This guide is here to be your supportive friend, walking you through every step with warmth and encouragement. Let’s explore how these little components can add so much soul to your beautiful work.
Giving Your Creations a Soulful Gaze
There’s a unique joy in watching a crocheted shape transform into a character just by adding eyes. It’s that final step where it feels like you’re giving your project a little soul. Amigurumi safety eyes are the key to this transformation, offering a clean and secure finish that sewn-on buttons or glue just can't match.
Think of a safety eye like a tiny button with a very clever, permanent back. The eye itself has a ridged post that you push through the small gaps in your crochet fabric. The washer is a small plastic disc that slides onto the post from inside your project, locking it in place.
Why Crafters Love Safety Eyes
The real magic is in that locking mechanism. Once you press the washer firmly onto the post, it clicks into place and is designed to stay there for good. It's a simple yet brilliant design that makes them a favorite for so many creators, a moment of commitment in your crafting journey, locking in the personality you’ve so carefully stitched.
This secure fit gives you peace of mind and lends your creations a polished, professional look. Choosing and placing the eyes is one of the most exciting parts of the whole process; it’s where you define your character's expression and watch them come alive.
- Professional Finish: They give a clean, uniform look that elevates the quality of your finished piece.
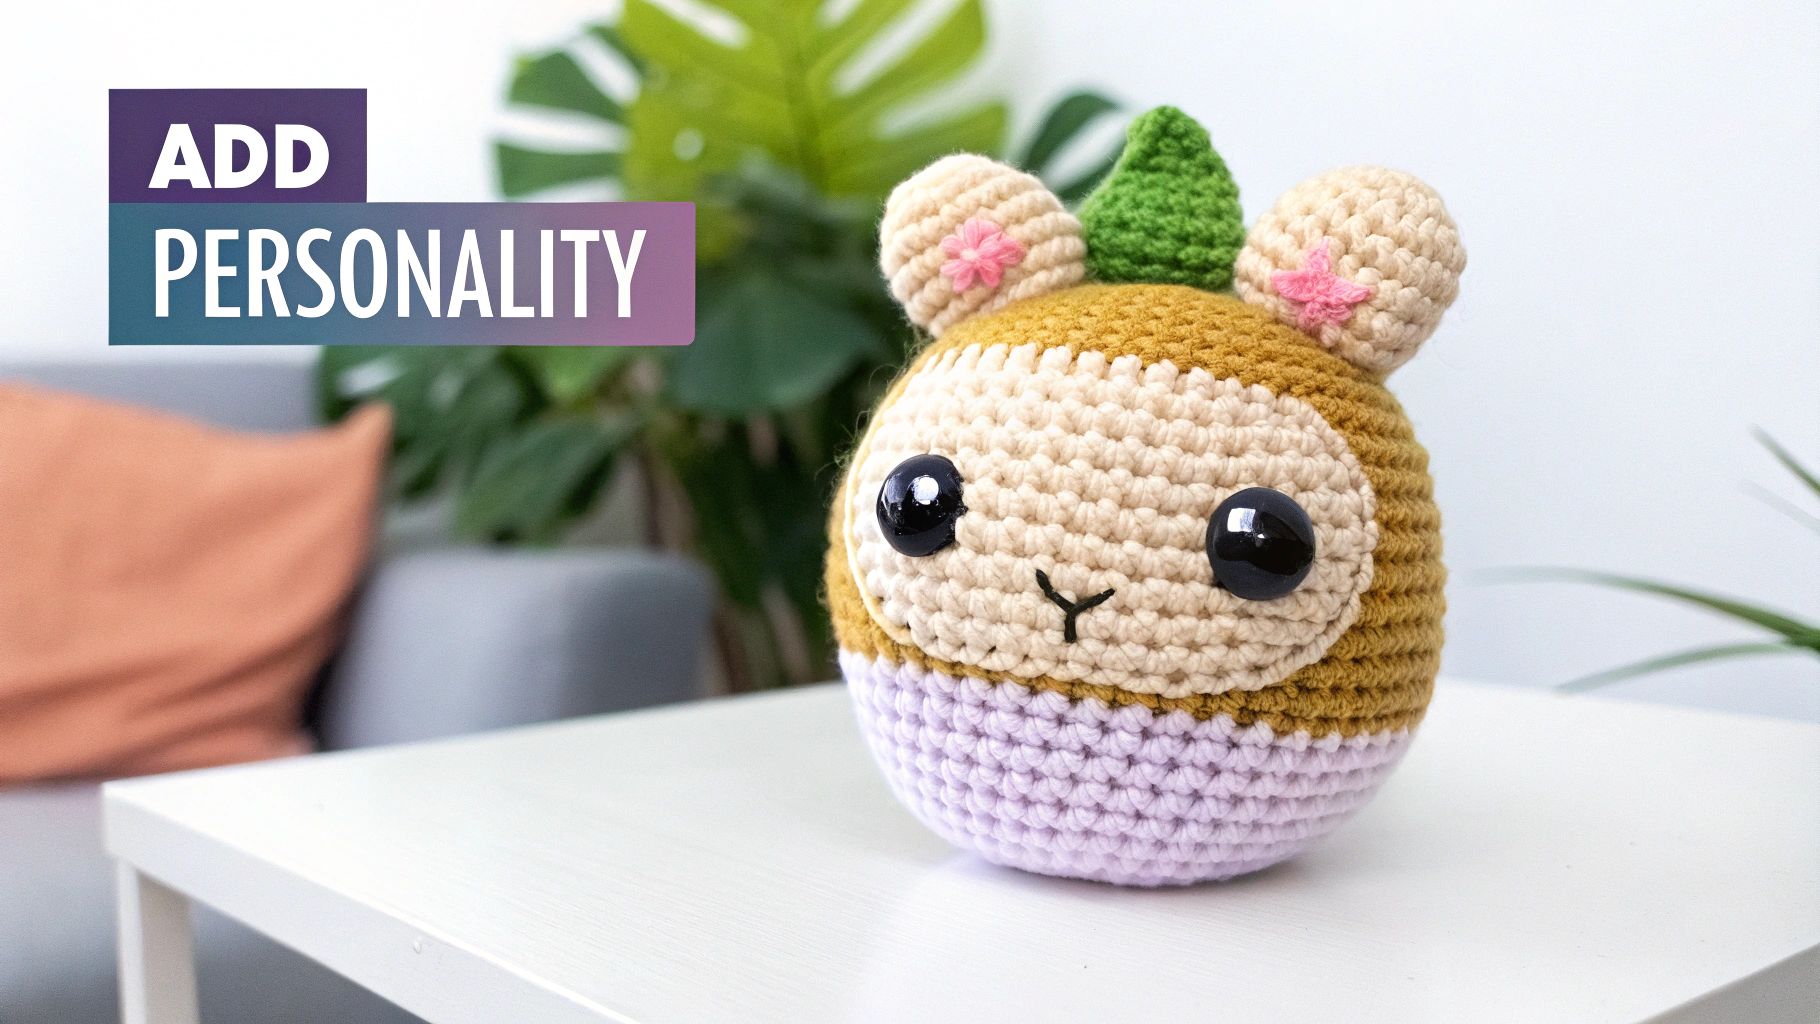
- Expression and Personality: The placement, size, and color of the eyes can create a huge range of emotions, from sweet and sleepy to bright and curious.
- Durability: That locking washer creates a strong bond with the fabric, making the eyes far more secure than glued or sewn-on alternatives.
The moment the eyes are in, your project stops being just yarn and stitches; it becomes a friend. It’s a wonderful reminder of how small details create connection and bring joy to both the creator and the recipient.
Learning how to properly use amigurumi safety eyes will build your confidence and open up a world of creative possibilities. It’s a simple skill that makes a huge impact, turning your thoughtful work into a cherished keepsake. If you're just starting, our guide on how to make the perfect amigurumi toy offers a wonderful foundation for your crafting adventure.
How to Choose the Perfect Safety Eyes
Choosing the right eyes for your amigurumi is like casting a character in a play, their size, color, and style truly define its personality. This is a wonderfully creative step where you get to decide if your creation will be bright and cheerful, sleepy and sweet, or full of curious wonder. It’s your chance to infuse a little bit of magic into the stitches.
Don't feel overwhelmed by the options! Think of this process as a fun treasure hunt. Every choice you make brings you closer to the unique character waiting to emerge from your yarn. We’ll walk through this together, making it simple and joyful.
Sizing Your Safety Eyes
The most important decision you'll make is choosing the right size. Safety eyes are measured by their diameter in millimeters (mm), and finding the perfect fit depends on the size of your amigurumi's head and the weight of your yarn. It's a bit like picking the right size buttons for a shirt: too big, and they can overwhelm the design; too small, and they might get lost.
A common pitfall for beginners is choosing eyes that are out of proportion. A great starting point is to consider your yarn. A project made with a thin, fingering weight yarn will need smaller eyes than one made with a thicker worsted weight yarn.
The global rise in DIY crafts has led to an explosion in options for amigurumi safety eyes. Today, you can find sizes ranging from a tiny 4.5 mm for miniature keychains to a huge 40 mm for large, cuddly plushies. This variety, with sellers on platforms like Etsy offering multi-size packs, ensures you can always find the perfect fit.
A Quick Sizing Guide
To help you get started, here's a simple reference guide. Think of it not as a strict rulebook, but as a friendly suggestion to help build your confidence. You can always adjust based on the look you’re going for!
Matching Safety Eye Size to Your Amigurumi Project
Use this quick reference guide to help you match the safety eye diameter to your project type and yarn weight.
|
Eye Size (mm) |
Best For Yarn Weight |
Typical Project Examples |
|---|---|---|
|
4 mm - 7 mm |
Fingering, Sport (thin yarns) |
Small keychains, pocket-sized animals, ornaments |
|
8 mm - 12 mm |
DK, Worsted (medium yarns) |
Standard-sized dolls, teddy bears, medium plushies |
|
13 mm - 18 mm |
Worsted, Bulky (thicker yarns) |
Larger stuffed animals, cuddly monsters, pillows |
|
20 mm+ |
Bulky, Super Bulky (chunky yarns) |
Big, huggable plushies, decorative statement pieces |
This table should give you a solid starting point for most projects. As you gain more experience, you'll develop an instinct for what size looks best for the character you're trying to create.
Exploring Different Styles and Colors
Beyond size, you have a whole world of styles to explore! While classic solid black eyes are incredibly versatile and give a timeless look, don’t hesitate to play with color and texture.
Colored Eyes: Blue, green, brown, or even purple eyes can add a pop of personality and realism. They're perfect for matching an outfit or giving your character a specific mood.
Glitter Eyes: For a touch of sparkle and magic, glitter safety eyes are a fantastic choice. They catch the light beautifully and are wonderful for fantasy creatures like unicorns or dragons.
Animal Eyes: You can also find specialized "cat-eye" or "slit-pupil" eyes that are perfect for making felines, frogs, or other unique critters.
Your project is a canvas for your imagination. Choosing the eyes is one of the most personal touches you can add. Trust your creative instincts. If a certain color or style brings a smile to your face, it’s the right choice.
Ultimately, selecting the perfect amigurumi safety eyes is about capturing the spirit of your creation. Use these guidelines as your starting point, but always feel free to experiment. The most beautiful results come from a place of joy and creative freedom.
A Step-by-Step Guide to Installing Safety Eyes
This is where the magic happens! Installing your amigurumi safety eyes is that wonderful moment your creation starts to look back at you, brimming with the personality you’ve stitched into every single round. It can feel like a big commitment, but with a bit of patience, you'll find it's one of the most rewarding parts of the process.
Let's walk through it together, one simple step at a time. We'll build your confidence and show you just how satisfying it is to bring your amigurumi to life.
Finding the Perfect Placement
Before you lock anything in, the first step is to audition the eye placement. This is your chance to play around and find the perfect expression. Are you going for sweet and innocent, or maybe a bit quirky? Moving the eyes by just a single stitch can completely change the vibe.
Here’s an actionable tip: use pins with colored heads as temporary placeholders. Pop them where you think the eyes should go, then take a step back and look at your project from every angle.
- Check the Symmetry: Are they spaced evenly from the center of the face?
- Evaluate the Height: Do they look better placed higher up for a wide-eyed look, or lower for a sleepier expression?
- Consider the Distance: How far apart should they be? Eyes that are closer together can look cute and focused, while wider-set eyes often give a gentler feel.
Don’t rush this part! Leave the pins in for a little while and see how you feel. This simple preview is the key to avoiding that little pang of regret when an eye gets locked in the wrong spot.
Inserting the Eye Post
Once you’re completely happy with your pin placement, it's time for the real deal. Remove one pin and gently push the post of the safety eye through the stitch it was marking.
The goal is to work the post between the fibers of your yarn, not to break them. If you’re working with a tight fabric, like the kind made from 100% mercerized cotton yarn, you might need to wiggle the post a little to ease it through. The crisp stitch definition of this yarn is fantastic for holding the eye securely without stretching.
Think of it like putting on an earring. You’re trying to find the existing hole rather than making a new one. A gentle, patient push is always better than forcing it, as this keeps your beautiful stitches intact.
After the first eye is in, do the same on the other side. Now, before you even think about grabbing the washers, take one final look. This is your last chance to make sure everything looks exactly how you pictured it.
This quick infographic breaks down the process into three simple, visual steps.
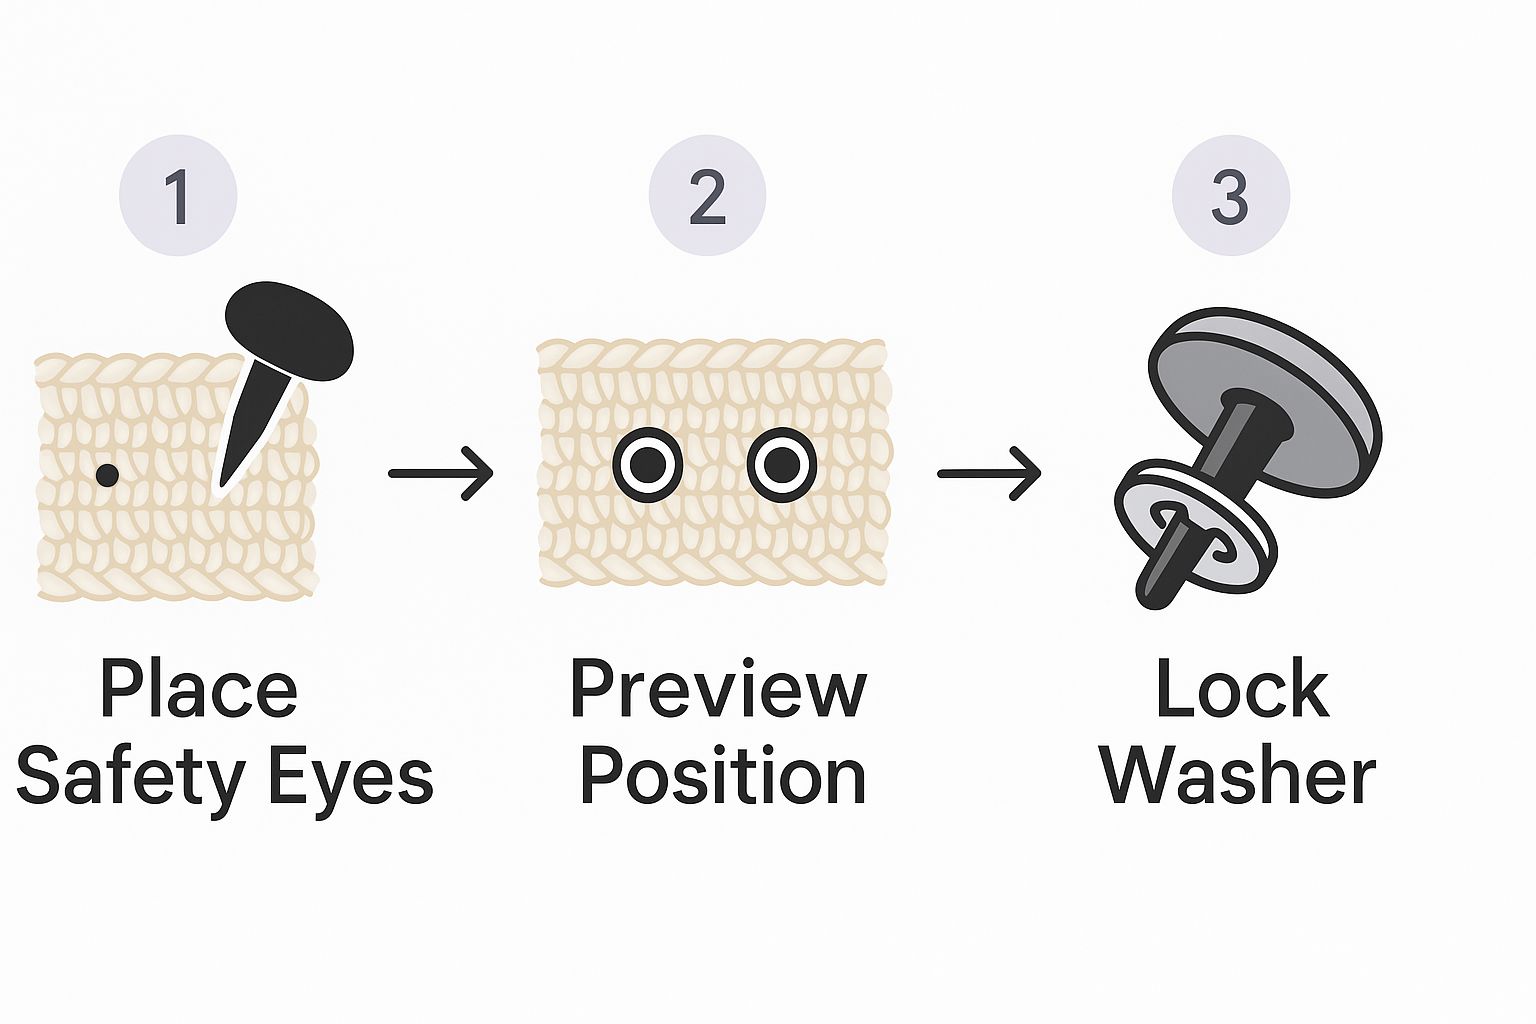
As you can see, it flows from careful planning with your pins to that final, secure click of the washer.
Securing the Washer for a Lasting Fit
Okay, here’s the moment of truth: locking it all down. This is the final and most important step for installing amigurumi safety eyes. Turn your amigurumi piece inside out so you can clearly see the posts sticking through.
Grab a washer and place it over the ridged post. You’ll notice one side is slightly domed and the other is flat—make sure the domed side faces away from your fabric, toward the end of the post. Now, press down firmly until you hear a satisfying click or snap. That's the sound of the washer passing over a ridge and locking securely into place.
For smaller eyes, pushing with your thumbs is usually enough. If you’re struggling, especially with larger eyes, here are a couple of actionable tips:
- Use a Hard Surface: Rest the front of the eye on a protected, flat surface (like a folded towel on a table). This gives you better leverage to push the washer down from the inside.
- Grab a Thimble: A simple thimble can be a real thumb-saver and helps you apply more focused pressure right where you need it.
Once that washer is on, it’s not going anywhere. This secure fit is what makes safety eyes such a reliable choice for creating toys meant to be loved. Now, take a moment to admire your work: you’ve officially given your creation its very own unique personality!
Troubleshooting Common Safety Eye Issues
Even with the best planning, things can go a little sideways. We've all been there: a washer refuses to budge, or you step back and realize an eye is just one tiny stitch off-center. Please don't panic! These moments aren't failures. They’re just part of the process, teaching us clever little tricks that make every future project that much easier.
Think of this section as your friendly guide for those small hiccups with your amigurumi safety eyes. Let's talk through some gentle, practical solutions together. Every single crafter has faced these issues, and working through them is how we build our skills and confidence.
My Washer Is Too Tight to Push On
This is probably the most common frustration, especially with larger eyes. Your thumbs get sore, and it feels impossible to get that final click. Don't worry, a little extra leverage is all you need.
Here are a few actionable tips to try right away:
Save Your Thumbs: A simple thimble is a game-changer. Pop it on your thumb to apply firm, direct pressure right in the center of the washer without bruising your finger.
Use a Hard Surface: Place the front of the eye on a folded towel on a sturdy table. This protects the shiny surface and gives you a solid base, letting you use your body weight to press the washer on from the inside.
Try the Spool Method: Grab an empty thread spool. Place it over the eye’s post from the inside and press down evenly on the rim of the spool. This distributes the pressure perfectly and makes it much easier to snap on.
These simple techniques give you the mechanical advantage you need to hear that satisfying click without a struggle.
Oh No, My Eyes Look Uneven!
You’ve locked the washers in, stuffed the head, and something just looks… a bit off. Maybe one eye is a smidge higher, or they aren't quite symmetrical. That little sinking feeling is totally normal, but it's not a lost cause.
Before you give up, try gently squishing and maneuvering the fabric and stuffing around the eyes. Sometimes, a little redistribution of the filling can help settle the eyes into a more balanced position. In fact, learning how to stuff properly is key to a well-shaped head.
To avoid this in the future, really trust the pin-placing method we talked about earlier. Leave those pins in for a few hours. Look at your project from every angle before you commit. A little patience upfront saves a lot of heartache later!
Crafting teaches us patience and problem-solving. Every "oops" is an opportunity to learn a new trick or discover a creative solution. Embrace these moments as part of your unique creative story.
What if I Locked a Washer on by Mistake?
Snapping a washer into place too soon or in the wrong spot can feel like a disaster, but it’s often fixable. Taking a washer off is tricky, after all, they’re designed not to come off, but it can be done with care. Remember to put your safety first when trying these methods.
A common technique involves using sturdy wire cutters or nail clippers to carefully snip the post of the eye from the inside. You have to be incredibly careful not to cut your yarn! Once you snip through the plastic post, the washer will come free. While this does sacrifice one safety eye, it completely saves your beautiful crochet work.
It's a delicate operation, but it's a fantastic skill to have in your back pocket. Remember, every challenge you overcome makes you a more resourceful and confident crafter.
A Guide to Crafting for Young Children
There's something incredibly special about crafting a toy for a child. As you pour your love into every single stitch, you’re not just making a doll, you’re creating a friend. Naturally, you want that friend to be as safe as it is cherished, which is where amigurumi safety eyes come into the picture.
The name "safety eye" comes from its smart two-part design. The combination of a post and a locking washer creates a bond that’s much more secure than a sewn-on button or a dab of glue. The whole idea is to prevent the eye from being pulled off, making it a preferable choice for toys meant to be loved and played with.
Mindful Crafting for Little Hands
When you create a handmade toy, you’re bringing a one-of-a-kind character to life. It’s a beautiful process, but it’s also important to remember that our unique creations don't go through the same official safety testing as toys you'd buy from a big-box store.
Because of this, we always encourage mindful crafting. The joy of giving a handmade toy comes with the responsibility of making sure it's enjoyed safely. For any amigurumi given to a baby or small child, we always recommend adult supervision during playtime.
Crafting with love means crafting with care. Your beautiful creations are meant to bring joy, and part of that joy is knowing they are being enjoyed in a safe and supervised environment.
Understanding Safety Standards
Toy safety is a serious topic. Thankfully, consumer safety campaigns have led to standards for components used in children's products. In places like the US and the EU, regulations require that parts like safety eyes pass mechanical pull tests to ensure they don’t become a hazard. Incident reports have shown that small toy parts are a major reason for emergency room visits among young children, which is exactly why that locking washer is such a critical feature.
This isn't meant to scare you, but to empower you. When you understand why they're called safety eyes, you can make more thoughtful decisions as a crafter, especially when your creation is destined for a family with little ones. Your handmade toy is a symbol of care, connection, and creativity. By choosing your materials thoughtfully and encouraging safe play, you ensure your gift is a source of pure delight.
Creative Alternatives to Plastic Safety Eyes
While plastic amigurumi safety eyes are a fantastic option for tons of projects, sometimes your creation calls for a softer, more personal touch. Stepping away from plastic is a wonderful way to stretch your creative muscles and give your amigurumi a truly one-of-a-kind personality.
Think of these techniques as adding more tools to your crafting toolbox. They open up a whole world of expressions, from sweet sleeping faces to big, expressive cartoon eyes, all brought to life with just a needle and some thread. It’s a chance to slow down and add a detail that is purely and beautifully handmade.
Embroidering Eyes with Yarn or Floss
Embroidering eyes, like the ones we have in our Crochetree dolls, is perhaps the most flexible alternative. With a simple darning needle and a bit of yarn or embroidery floss, you can stitch a personality right onto your project. This method gives you total creative freedom over the shape, size, and style of the eyes.
This approach is especially reassuring when you're crafting for babies and toddlers. Since the eyes are made from the same soft fibers as the doll itself, they are perfectly gentle and completely secure.
Here are a few simple embroidery stitches to get you started:
French Knot: This classic stitch makes a perfect little dot, which is ideal for tiny, sleepy, or minimalist eyes.
Satin Stitch: By making a series of straight stitches right next to each other, you can fill in a shape to create a solid, expressive eye.
Straight Stitch: A simple line can create a sweet, sleeping "U" shape or be used to add charming little eyelashes and eyebrows for extra character.
Think of your needle and thread as a paintbrush. You can create any expression you can imagine! Don't be afraid to play around. Even a few simple stitches can bring a world of personality to life.
If you’re new to stitching faces, it can feel a little intimidating at first. For those who’d like a helping hand, our Eyes Embroidery Video Course offers clear, step-by-step visual lessons to help you master these delightful details with confidence.
Creating Gentle Eyes with Felt
Another wonderful alternative to plastic amigurumi safety eyes is using felt. This is a fantastic choice when you want to create larger, softer eyes with a gentle, friendly look. The best part? Felt doesn’t fray, making it super easy to cut into clean circles, ovals, or any other shape you can dream up.
To make felt eyes, just cut two identical shapes for the main white part of the eye, then cut two smaller circles from black or colored felt for the pupils. You can even add a tiny white felt dot on the pupil to create a sweet little highlight. Simply secure the pieces to the face using a matching color of embroidery floss and a simple running stitch around the edge.
This method gives your project a beautiful, handcrafted aesthetic that’s full of warmth and charm. It’s another great way to ensure your creation is soft and cuddly from head to toe.
While you're refining your amigurumi toolkit, the right hook makes every stitch easier. See our best crochet hooks buying guide for the hooks we recommend for amigurumi.
Your Amigurumi Safety Eyes Questions Answered
As you get deeper into your crafting journey, a few questions about amigurumi safety eyes are bound to come up. We've gathered the most common ones here to give you clear, simple answers so you can keep creating with confidence.
Can I Add Safety Eyes After Stuffing?
This is a classic question, and the short answer is: not really. It’s always best to install safety eyes before you’ve stuffed and closed your project. The washer needs to be snapped on from the inside, which is nearly impossible to do once the piece is full.
For the best results, always place your eyes while you still have easy access to the back of the fabric.
What Is the Best Yarn for Amigurumi?
For amigurumi, you want a yarn that is smooth, sturdy, and gives you great stitch definition. We absolutely love using 100% mercerized cotton in a fingering weight for our dolls.
This yarn is fantastic because its smooth, durable fibers hold shape well and provide crisp stitch definition. This helps hold the safety eye securely and prevents the fabric from stretching out over time, giving your creation a beautiful, lasting structure.
How Do I Know What Size Safety Eyes to Use?
Choosing the right eye size is more of an art than a science, but a good rule of thumb is to match it to your yarn weight and the scale of your project.
For small projects using fingering weight (thin) yarn, 6 mm to 8 mm eyes usually work perfectly.
For standard dolls made with DK or worsted weight (medium) yarn, 9 mm to 12 mm is a great place to start.
When you're not sure, try the actionable tip of placing black-headed pins where the eyes will go. This lets you test out the placement and see what size looks most proportional before you make any permanent holes.
Trust your creative intuition! The “perfect” size is the one that best captures the personality you envision for your project.
Are Safety Eyes Really Safe for Babies?
While the locking washer is designed for a secure fit, no handmade toy component can be guaranteed as completely safe for infants without official safety testing. A determined toddler can work anything loose over time.
For this reason, we always recommend adult supervision when a baby or small child is playing with a handmade toy. If you want total peace of mind, embroidered eyes are a wonderful, soft alternative for any project intended for the littlest ones.
We hope this guide helps you feel even more prepared and inspired for your next amigurumi adventure! At Crochetree, we believe every stitch is a step toward creating something beautiful and meaningful, connecting us through the shared joy of crafting.
Ready to find the perfect yarn and patterns for your next creation? Explore our collection at Crochetree and bring your next adorable character to life.


