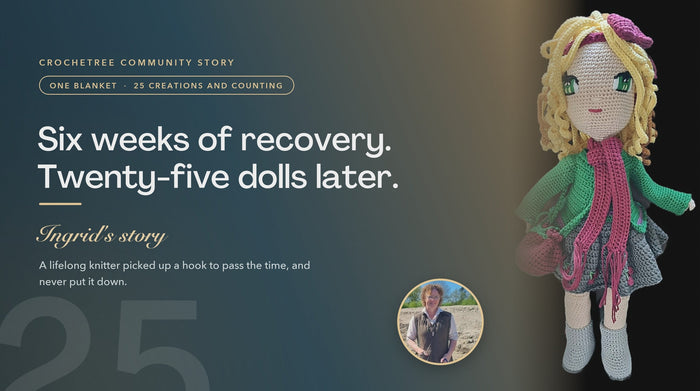
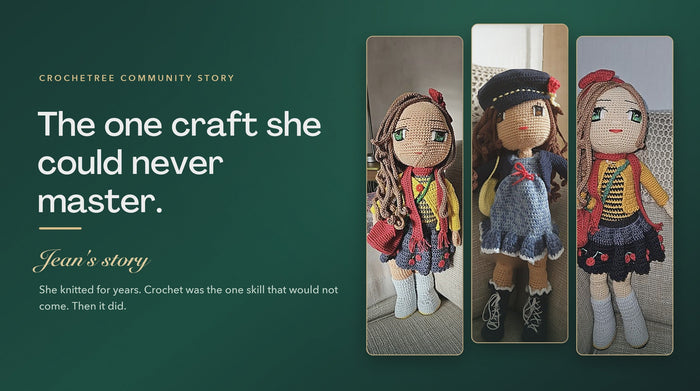
Pick up a finished Crochetree doll and it is not obvious how it was built. There is no seam across the hips. The head sits upright instead of lolling forward. The eyes are clearly not plastic. And the hair falls in real corkscrew curls with no visible knots underneath.
None of that is accidental. This guide walks through how a Crochetree doll is actually constructed, part by part, using the photos from our own Daisy Base Doll pattern, the pattern that most of our characters in the catalog is built on. If you understand the structure, every pattern you open afterward makes more sense.

The One Idea That Explains Everything Else
Most amigurumi guides describe a doll as a set of separate pieces: a sphere, a cylinder, four tubes, all sewn together at the end.
A Crochetree doll is not built that way. The body is one continuous piece worked from the bottom up. You begin at the sole of a foot, crochet up through the foot, ankle, calf, knee, and thigh, make the second leg the same way, then join the two legs and keep going straight up through the hips, waist, chest, shoulders, and neck without ever cutting the yarn.
Only three things are made separately: the two arms and the head. And even the arms end up crocheted into the body rather than simply stitched onto the surface.
That single decision is why there is no visible seam at the hips, why the proportions stay consistent, and why the doll holds its shape when a child picks it up by one leg.
It Starts With a Chain, Not a Magic Ring
Almost every amigurumi shape you have ever made starts with a magic ring, which produces a circle. A circle produces a ball. A ball rolls.
The sole of a Crochetree doll foot starts with a chain instead. You work down one side of the chain, around the end, and back up the other side, which gives you an oval rather than a circle. That oval is the footprint the whole doll stands on.

Then comes the part most makers skip and later regret: a piece of cardboard or thin plastic is cut to the shape of the sole and dropped inside the foot before the shaping closes over it. Stuffing alone will round out a sole over time. A rigid insert keeps it flat permanently, which is most of the reason these dolls can stand on their own two feet, leaning against something.

Legs With Actual Knees
From the ankle upward the leg is shaped rather than tubular. There are decreases to bring the ankle in, gentle increases to build the calf, and a distinct sequence of stitches that creates a knee: a short run of slip stitches and increases worked across one side only, so the leg bends visually in the right place.

This is also where the pattern asks you to do something unusual. Before working the knee, you flatten the leg to check where the working stitch has ended up, add a few extra stitches if needed to bring it to the center back, and move your marker there. Because the whole doll is worked in a spiral with no joins, the start of the round drifts slowly around the piece. If you shape a knee without correcting that drift, the knee ends up on the side of the leg.

Where Two Legs Become One Body
The join is a single round. You work partway around the first leg, chain a couple of stitches to bridge the gap, single crochet into the second leg, work all the way around it, come back across the bridging chain, and finish the round on the first leg. From that round on you have one tube instead of two, and you simply keep going.

Above the join the body is shaped with increases through the hips, a taper at the waist, a color change from underwear to skin, and a narrowing toward the shoulders. The neck is finished on the smaller hook so the fabric there is denser, because the neck is the part that has to hold everything up.
The Arms Are Sewn On, and Then Crocheted Over
This is the step that surprises people who have made other amigurumi.
The arms are worked separately, each starting from a magic ring at the hand and running up as a narrow tube. But they are not attached at the end of the project. You stop crocheting the body partway up the chest, flatten it to find the midpoint of each side, mark four stitches on each arm, and whip stitch the arms into the body there, leaving a set number of free stitches across the front and the back.


Then you pick the yarn back up and keep crocheting around the body and over the joined arms, treating them as part of the same tube. The shoulders are formed by that continued round.
The result is a shoulder that is structurally part of the body rather than a joint bearing the arm's weight on a line of stitches. It is why Crochetree arms do not sag away from the torso over time.
The Skeleton Inside
Before the shoulders close over, two rigid pieces go in.
The first is a length of 2 mm coated wire. One end is fed into the right arm, the wire is wrapped around the stick inside the chest, and the other end runs out into the left arm. The ends are folded back and taped so nothing sharp can work its way through the fabric. Each arm is then stuffed around its wire. That wire is what lets a finished doll hold a pose. Bend the arm and it stays bent.

The second is a stick, about 20 cm long and 8 mm in diameter, either acrylic or a sturdy wooden equivalent. It runs from the crotch, up through the body and neck, and stops at the very top of the head. It does not go in the legs. Its only job is to stop the head from tipping forward, which a stuffed neck cannot do on its own once you add a head plus a full crocheted wig on top of it.

The Head Is Finished Before It Is Closed
The head is a piece that does begin with a magic ring. It is increased evenly out to its widest point, worked straight for a long stretch to give the face its height, and then decreased back down to the same stitch count as the neck.
But the pattern stops halfway. Before any of the decreasing starts, while the head is still an open bowl, you put it down and embroider the face.
That order matters enormously. An open head can be turned, held from the inside, and worked on from any angle, and you can see exactly where your needle is coming through. Trying to embroider a face onto a closed, firmly stuffed head is a completely different and much harder job.
Embroidered Eyes, Never Safety Eyes
Crochetree dolls have no safety eyes. The eyes are embroidered with floss, and the pattern for them is long enough that it has its own separate PDF alongside the doll.

Placement is not eyeballed. You keep the marker yarn that has been tracking the start of your rounds all the way through the head, then count a set number of stitches from it and pin the exact spot where the first eye begins. The second eye is counted from the same reference, which is what keeps a pair of eyes level and evenly spaced.
The eye itself is built in layers: the dark outline first, then the iris, then the lighter shades of gray, then the white catchlight that makes it look wet, and finally the lashes and brow. The mouth uses a dark red, and the nose is a few small stitches. It is closer to painting than to crochet, and it is the single biggest reason two makers can follow the same pattern and end up with dolls that look like different people.
The Wig Is One Piece, Grown in a Spiral
Doll hair is what most people assume is the hardest part, and it is usually imagined as hundreds of strands knotted individually into the scalp.
That is not how a Crochetree wig works. It is one crocheted piece, and it is grown, not attached.

You start with a magic ring, exactly as if you were making a small flat circle. Then the rounds alternate. On one round you work into the front loops only and produce a set of long locks: chain out to the full length of the hair, turn, and work back along that chain. On the next round you go back to the back loops of the round below and simply increase the cap by one ring, which gives you more stitches to grow the next set of locks from.
The curl is not added afterward. Each lock begins with a run of increases worked in half double crochet, and those extra stitches force the strip to twist on itself into a corkscrew as you work back down it. More increases give you a tighter curl. Fewer give you a wave. That is the whole mechanism.

Color is handled the same way. Because the cap grows outward ring by ring, switching yarn between rounds puts a different shade on a different layer of locks, which is how you get natural looking highlights rather than a flat block of one color. The one honest caveat is that each of those changes leaves yarn ends, and they are hidden between the wig and the head rather than eliminated.
Some of the last hair locks are worked much shorter than the rest. Those short ones sit at the center of the forehead and become the fringe. Then the back loops of the cap are stitched to a specific round of the head, so the wig always sits at the same height, and the outer locks are pinned and sewn down at the back.

Assembly Is Almost an Anticlimax
Because so much has already been joined along the way, the final assembly is short. The neck and the head finish on the same stitch count, so they are matched stitch for stitch and sewn around with a tapestry needle. A last handful of stuffing goes into both the head and the neck through the remaining gap before the final stitches close it, which is what keeps the join firm rather than pinched.

Then the clothes go on, and that is the doll.
Why the Proportions Look the Way They Do
Crochetree dolls are not chibi. They are slim, long-limbed, and closer to a fashion doll than to a round amigurumi character, and that comes down to gauge as much as to shaping.
Everything is worked in fingering weight mercerized cotton on 2.0 mm and 2.5 mm hooks. That is a very small hook for the yarn, deliberately, because it produces a dense fabric that does not let stuffing show through and holds a shaped calf or a defined waist without sagging. Worked at that gauge, the Daisy base doll comes out around 38 cm, or roughly 15 inches, tall.
Change the yarn weight and the hook together and the whole doll scales up or down proportionally, which is the one modification the pattern actively invites.
Make One Yourself
Everything above is one pattern: Daisy, the Crochetree Base Doll. She is the foundation the rest of the catalog is built on, and once you have made her, changing the hair length, the hair color, the eye shape, or the outfit is what turns her into anyone else.
If you would rather be walked through it on video, the Daisy Base Doll Video Course covers the same build step by step, including the parts that are much easier to watch than to read: the sole, the knee placement, joining the legs, sewing the arms in, and the wig.
And if you are not at doll stage yet, the Crochet Basics Beginner Course starts from the very first stitch. Or browse the full collection of doll patterns to see what the same structure looks like as forty different characters.
Now that you know what is underneath, one stitch at a time, you can craft this.
Frequently Asked Questions
Do Crochetree dolls use safety eyes?
No. Every Crochetree doll has embroidered eyes, worked with embroidery floss directly into the crochet fabric while the head is still open at the top. There are no safety eyes, no buttons, and no beads. That is what gives the dolls their soft, painted expression, and it also removes the most common choking hazard from a doll meant to be handled by a child.
Why does my crochet doll's head flop over?
Because there is nothing inside holding it up. A Crochetree doll has a rigid stick running from the crotch, through the body and neck, all the way to the top of the head. Without it, a stuffed neck cannot carry the weight of a stuffed head plus a full crocheted wig, and the head tips forward. The stick goes in the body, neck, and head, never in the legs.
Are the legs sewn onto a Crochetree doll body?
No. The legs and the body are one continuous piece. You start at the sole of each foot, work all the way up the leg, then join the two legs and keep crocheting upward into the hips, torso, chest, and neck without ever cutting the yarn. Only the arms and the head are made separately and attached.
How is the hair made on a Crochetree doll?
The wig is a single crocheted piece. You alternate rounds: one round grows the cap, the next round grows a set of long locks out of the front loops of the round below. The curls are formed by increases worked along each lock, which forces it to spiral. There is no knotting strand by strand, and no braiding.
What yarn and hook size are Crochetree dolls made with?
One hundred percent mercerized cotton in a fingering weight, worked with 2.0 mm and 2.5 mm hooks. The smaller hook is used where the fabric needs to be tighter, such as the upper head and the neck. Worked at that gauge, the Daisy base doll stands about 38 cm, or roughly 15 inches, tall.