
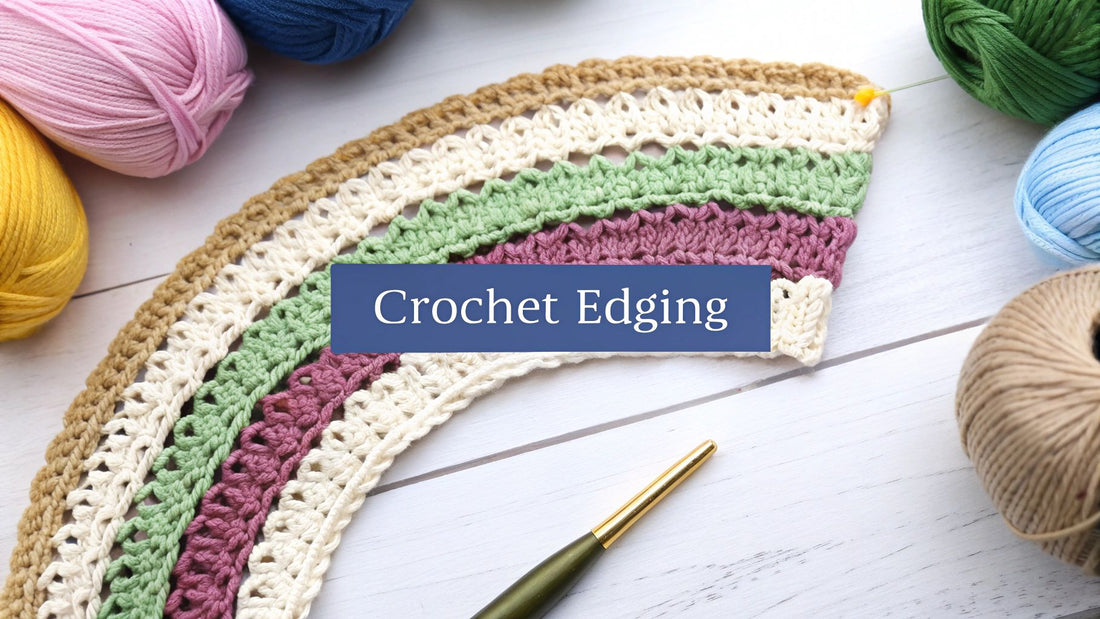
Welcome, creative soul! You’ve poured your heart into crocheting a beautiful scarf, choosing the yarn, perfecting each stitch, and watching the fabric grow. Now it's time for the final, transformative touch: the border. Adding a well-chosen edging for a crochet scarf does more than just complete the piece; it prevents curling, adds durability, and elevates your creation from simply handmade to truly handcrafted.
Crafting is a journey of joy and healing, a way to connect with ourselves and create something meaningful. That final border is a celebration of your work and a chance to infuse it with your personal style. In this guide, we'll explore several wonderful edging options, from simple to decorative, each with its own unique charm. You'll find actionable tips to help you select and execute the perfect finish with confidence.
Whether you're a new crocheter looking for a clean, simple finish or an experienced crafter ready to add a flourish with a picot or shell stitch, this list has you covered. Let’s explore how to add that polished, professional touch that will make your scarf truly special.
1. Single Crochet Edging
The single crochet edging is the quintessential finishing touch for any crochet scarf, offering a clean, structured border that is both simple to create and incredibly effective. It’s the perfect starting point for beginners and a reliable favorite for experienced crafters. This fundamental technique involves working a round of single crochet (sc) stitches evenly around the entire perimeter of your finished scarf, instantly taming unruly edges.
This edging for a crochet scarf provides a polished, professional look without distracting from the main stitch pattern. Its versatility makes it suitable for virtually any project, from a rustic cotton scarf to a delicate baby blanket scarf. If you are just starting your crochet journey, mastering this stitch is a fantastic first step. For a comprehensive guide, learn more about basic crochet stitches for beginners.
When to Use This Edging
Choose the single crochet edging when your goal is understated elegance and function. It’s ideal for scarves that already have a complex or textured stitch pattern, as it won't compete for attention. It also works wonders on projects made with yarns that tend to curl by providing a firm, flat border.
Actionable Tips for a Perfect Finish
To achieve a flawless single crochet border, here are some actionable tips you can try right away:
- Go Down a Hook Size: Use a crochet hook one size smaller than the one used for the scarf body. This creates tighter, denser stitches that hold the edge securely and prevent it from stretching.
- Master the Corners: To keep your scarf corners sharp and flat, work three single crochet stitches into each corner stitch or space. This provides the necessary fabric to make the 90-degree turn without puckering.
- Space Stitches Evenly: Along the raw side edges, aim for one single crochet stitch per single crochet row, and two single crochet stitches per double crochet row. This rule of thumb helps maintain even tension and a smooth look.
- Join Seamlessly: Finish your round by joining the last stitch to the first with a slip stitch. Weave in your ends securely to ensure a durable and invisible finish.
2. Picot Edging
For those looking to add a touch of elegance and delicate detail, the picot edging is a beautiful choice. This decorative border features tiny, ornamental loops that create a sophisticated, lace-like finish. The technique involves creating a small chain of stitches (typically three) and then slip stitching back into the base stitch, forming a petite loop known as a "picot."
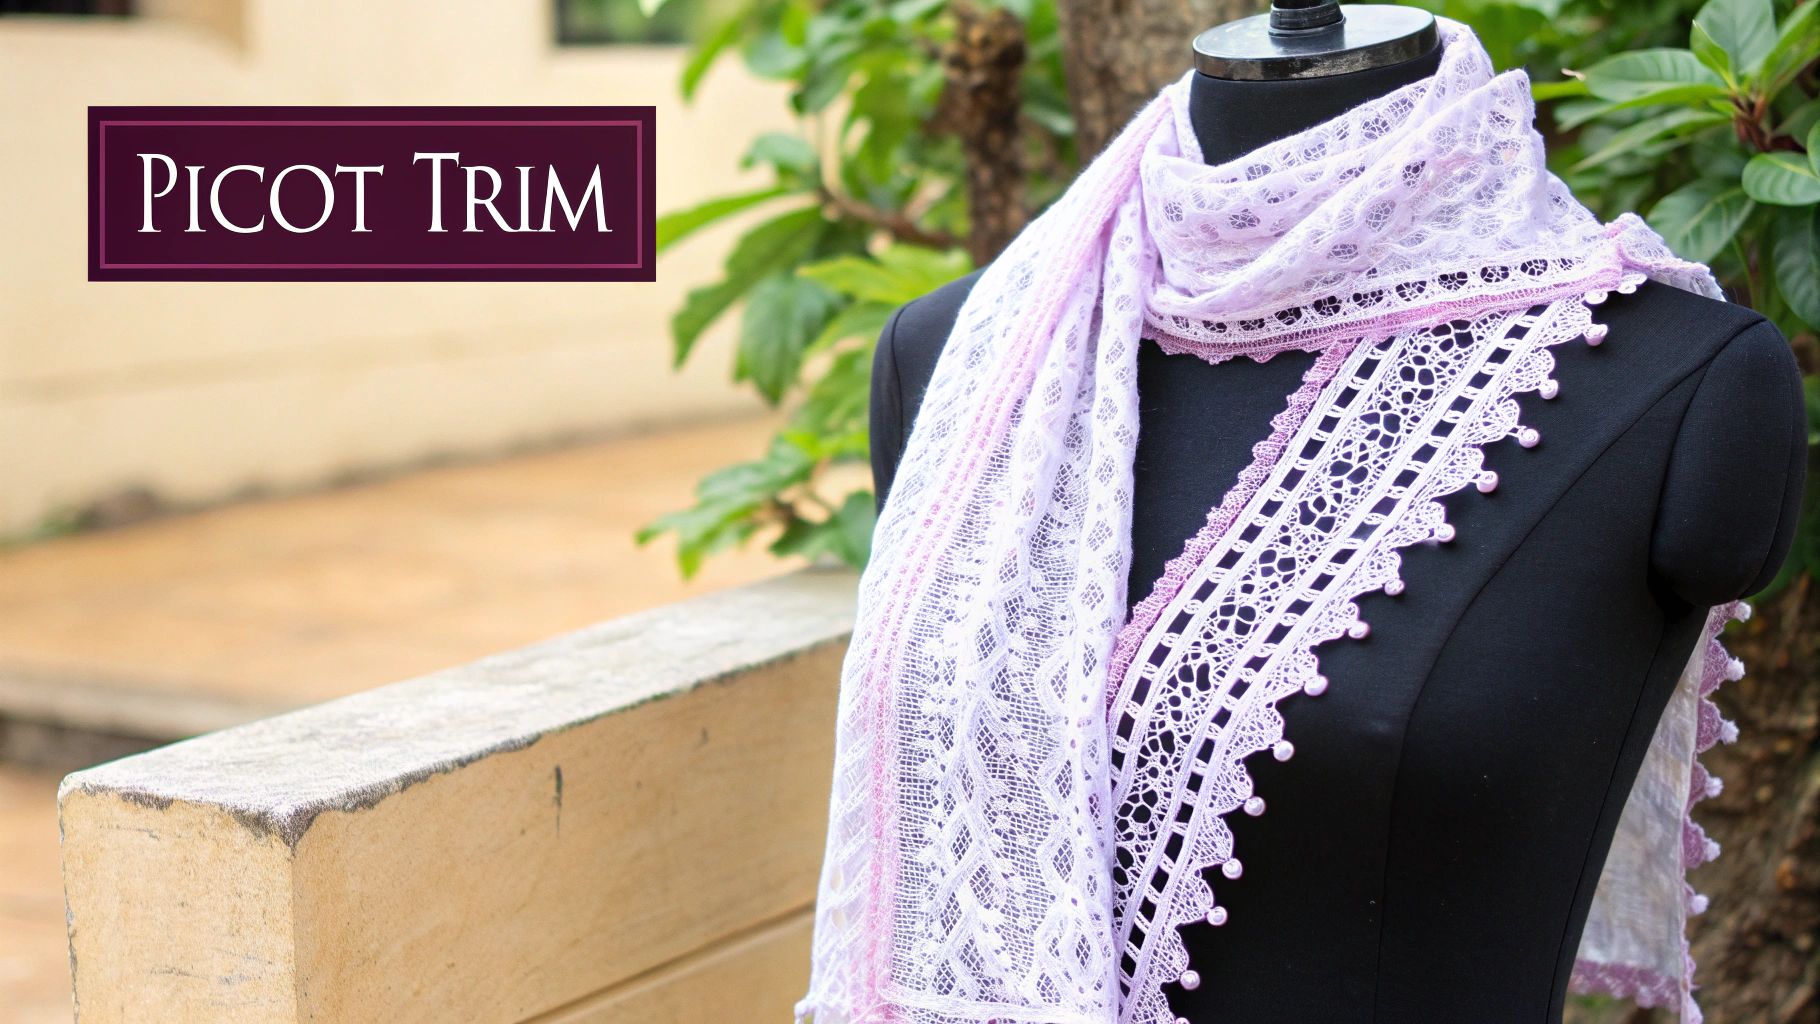
This classic edging for a crochet scarf instantly elevates a simple project into something truly special. It is perfect for lightweight scarves and shawls where a dainty, vintage-inspired look is desired. The picot stitch adds texture and visual interest without overwhelming the main body of the scarf, making it a wonderful complement to both simple and intricate stitch patterns.
When to Use This Edging
Choose the picot edging when you want to impart a graceful or celebratory feel to your scarf. This edging works beautifully with fine yarns like mercerized cotton or wool blends, as these materials highlight the crispness and detail of each tiny loop.
Actionable Tips for a Perfect Finish
To create beautiful, uniform picots that enhance your scarf, follow these key tips:
- Consistent Chain Tension: The key to perfect picots is maintaining even tension in your chain stitches. Practice a few to find a comfortable rhythm so your loops are all the same size.
- Strategic Spacing: Proper spacing is crucial for a balanced look. As a general rule, place one picot stitch every 3-5 single crochet stitches along your border. This prevents the edge from looking too cluttered or too sparse.
- Use Stitch Markers: To ensure your picots are perfectly spaced, especially on long edges, use stitch markers. Count your stitches and mark the spot for each upcoming picot to keep things even.
- Block Your Edging: Gently washing and pinning your finished scarf into shape will help open up the picot loops, defining their shape and giving your edging a professional, polished appearance.
3. Shell Edging
The shell edging is a classic decorative border that brings a touch of vintage elegance and rhythmic beauty to any crochet scarf. This beautiful finish consists of multiple double crochet stitches worked into the same stitch or space, fanning out to create delicate, scalloped shells. It’s a timeless choice that adds substantial visual interest and a soft, flowing edge.
This popular edging for a crochet scarf is surprisingly simple to create, typically involving a pattern of 5 to 7 double crochets in one stitch, followed by skipping a few stitches and anchoring the shell with a single crochet. The result is a graceful, wave-like border that transforms a simple project into an heirloom-quality piece. For more inspiration, you can explore various crochet finishing techniques.
When to Use This Edging
Choose the shell edging when your scarf needs a decorative flair that is both classic and eye-catching. It is particularly effective on projects with simple stitch patterns, as it adds texture and a beautiful scalloped detail. This edging is also perfect for heirloom baby blankets, shawls, and scarves intended as special gifts.
Actionable Tips for a Perfect Finish
To create beautiful, uniform shells, pay close attention to your stitch placement and count:
- Consistent Shell Size: Decide on a specific number of double crochet stitches for your shells (e.g., five) and use it consistently. Inconsistent stitch counts will result in uneven scallops.
- Mark Your Placement: Before starting, use stitch markers to plan out the placement of your shells. This ensures they are evenly spaced around the entire scarf, preventing awkward gaps.
- Adapt for Corners: To help the corner turn smoothly, work a larger shell in each corner stitch. This might mean adding two or three extra double crochet stitches to your standard shell to provide enough fabric for a flat turn.
- Block for Definition: Blocking is essential for this edging. Gently stretching and pinning the shells into their final shape while damp will open up the stitches and define the scalloped points.
4. Crab Stitch Edging (Reverse Single Crochet)
The crab stitch, also known as reverse single crochet, is a unique and highly textured edging for a crochet scarf that creates a beautiful, rope-like border. Unlike traditional crochet, this stitch is worked in the opposite direction—from left to right. This unconventional motion produces a sturdy, corded appearance that adds impressive structure and a decorative finish.
This technique adds a substantial, almost braided edge that prevents stretching and curling while providing an eye-catching visual element. It’s perfect for adding weight and definition to blanket scarves or creating a durable border for items that will see a lot of use. The raised texture gives a satisfying tactile quality to the finished piece.
The following infographic illustrates the three key steps to mastering the crab stitch motion.
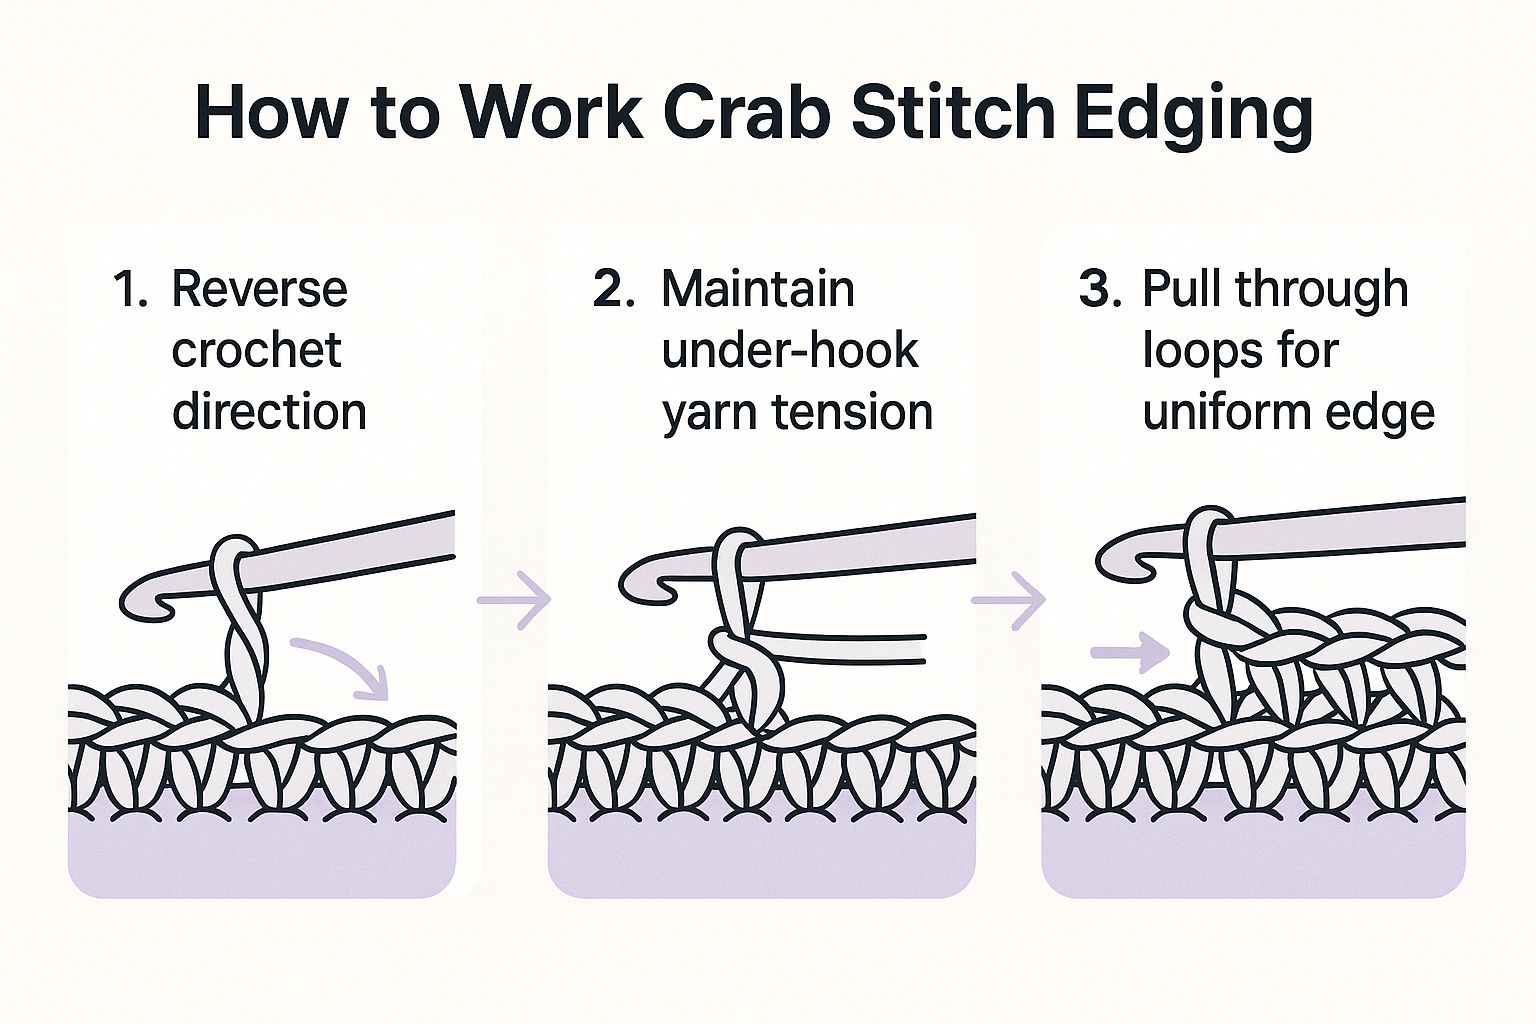
This visual guide breaks down the process, emphasizing the reverse direction and correct yarn handling required to form the distinctive twisted stitches.
When to Use This Edging
Choose the crab stitch when you want a decorative yet highly functional border. It is an excellent choice for projects needing a sturdy, non-stretch edge, such as scarves made from cotton blends or wool. Its durability also makes it ideal for accessories that need to withstand frequent washing and active use.
Actionable Tips for a Perfect Finish
Achieving a neat crab stitch border requires a bit of practice, but these tips will help you master it:
- Practice the Motion: Before working on your final project, practice the reverse single crochet motion on a swatch. This will help you get comfortable with the unusual left-to-right movement.
- Consistent Tension is Key: Maintaining even tension is crucial for a uniform, corded look. Work slowly at first until the rhythm feels natural to you.
- Keep Yarn Under Hook: For the stitch to form its characteristic twist, ensure your working yarn stays below the hook as you pull up a loop.
- Work into Every Stitch: For a dense and even edge, work one crab stitch into each stitch around the perimeter. At the corners, work three stitches into the corner space to allow the fabric to lie flat.
5. Fringe Edging
Fringe edging is a classic and playful way to finish a crochet scarf, adding texture, movement, and a touch of bohemian flair. This decorative border is created by cutting multiple strands of yarn and attaching them in bundles to the short ends of your scarf. It's an incredibly customizable technique that requires no additional crochet stitches, making it a fantastic and fast option for all skill levels.
This popular edging for a crochet scarf can transform a simple project into a statement piece. The length, thickness, and color of the fringe can be adjusted to achieve countless looks. The swinging movement of the fringe adds a dynamic and eye-catching quality that is both fun to make and to wear.
When to Use This Edging
Choose a fringe edging when you want to add personality, weight, and a free-spirited vibe to your scarf. It's the perfect choice for simpler stitch patterns, as it becomes the main decorative feature. Fringe also adds a satisfying drape and weight to lighter scarves, helping them hang beautifully.
Actionable Tips for a Perfect Finish
To create a professional-looking and durable fringe, follow these practical tips:
- Calculate Your Length: For a neat finish, cut your yarn strands to be at least twice the desired finished length, plus an extra inch for trimming.
- Use a Template: Create a template from a sturdy piece of cardboard or a book that is the exact length you need for each strand. Wrapping your yarn around it and cutting one end ensures all your pieces are perfectly uniform.
- Space Evenly: Attach your fringe bundles evenly across the scarf's edge for a balanced look. A good starting point is to attach one bundle every two or three stitches.
- Trim for Perfection: After attaching all the fringe, lay your scarf flat and use a rotary cutter or sharp scissors to trim the ends. This final step creates a crisp, perfectly even line that elevates the entire project.
6. Scalloped Edging
The scalloped edging brings a touch of classic elegance to any crochet scarf, creating a gentle, wave-like border that is both decorative and graceful. This beautiful finish uses a combination of stitches with varying heights—such as single, half double, and double crochet—worked in a repeating sequence to form soft, rounded curves. It’s a timeless technique that adds a sophisticated and feminine flair.
This popular edging for a crochet scarf evokes the charm of vintage lace and is perfect for adding visual movement and a soft frame. The pattern provides a polished finish that complements both simple and intricate scarf designs without overwhelming them. It’s an excellent way to practice controlling stitch height and creating intentional, beautiful shapes.
When to Use This Edging
Choose the scalloped edging when you want to add a soft, decorative finish with a touch of romance. It is ideal for scarves made with finer yarns like fingering or DK weight, as these materials allow the delicate curves to drape beautifully. This border is particularly stunning on shawls and projects intended as special gifts, where an elegant final touch is desired.
Actionable Tips for a Perfect Finish
To achieve beautifully formed and even scallops, keep these practical tips in mind:
- Mark Your Repeats: Use stitch markers to mark where each scallop begins and ends. This is especially helpful for longer scarves, ensuring your pattern repeats are consistent.
- Maintain Consistent Stitch Height: The beauty of a scallop comes from the smooth transition between different stitch heights. Focus on maintaining consistent tension for each type of stitch to create a uniform, flowing curve.
- Block for Definition: Blocking is essential for this edging. Gently wet or steam your finished scarf and pin out each scallop to its full shape. This process opens up the curves and sets the stitches, revealing the border's true beauty.
- Practice on a Swatch: Before starting on your scarf, work a few repeats of the scallop pattern on a small practice swatch. This allows you to get comfortable with the stitch sequence and tension without risking your main project.
6 Crochet Scarf Edging Styles Comparison
| Edging Type | Implementation Complexity 🔄 | Resource Requirements ⚡ | Expected Outcomes 📊 | Ideal Use Cases 💡 | Key Advantages ⭐ |
|---|---|---|---|---|---|
| Single Crochet Edging | Low 🔄 | Minimal ⚡ | Neat, uniform, flat edge 📊 | Beginner scarves, any yarn weight 💡 | Easy, quick, stabilizes edges ⭐ |
| Picot Edging | Medium 🔄 | Low to Moderate ⚡ | Delicate, lace-like loops 📊 | Dressy scarves, fine to medium yarn 💡 | Elegant, decorative, professional ⭐ |
| Shell Edging | Medium-High 🔄 | Moderate ⚡ | Scalloped, fan-like, wide edge 📊 | Medium to bulky yarn, decorative scarves | Eye-catching, classic, hides flaws ⭐ |
| Crab Stitch Edging | Medium-High 🔄 | Low to Moderate ⚡ | Raised, rope-like texture 📊 | Structural edges, durability needed 💡 | Durable, stabilizes, unique texture ⭐ |
| Fringe Edging | Low 🔄 | Low ⚡ | Flowing tassels, bohemian style 📊 | Casual, colorful, leftover yarn use 💡 | Dramatic, easy, versatile ⭐ |
| Scalloped Edging | High 🔄 | Moderate ⚡ | Curved, wave-like, elegant pattern 📊 | Formal scarves, medium to fine yarn 💡 | Decorative, sophisticated, classic ⭐ |
Embrace Your Creativity and Finish with Flair
Every stitch in your scarf tells a story of creativity and dedication. The border you choose is the final chapter, a beautiful conclusion to that crafting journey. We've explored a variety of techniques, from the elegantly simple Single Crochet Edging to the playful texture of the Picot stitch. Each option provides a unique personality, transforming a good project into a great one.
We hope these ideas for adding an edging for crochet scarf projects have inspired you to experiment and find the perfect match for your work. Don't be afraid to try a new stitch; the most wonderful creations often come from playful exploration. The final border is where your personal style can truly shine, turning a simple accessory into a treasured, handmade masterpiece.
Key Takeaways for a Flawless Finish
To ensure your scarf edging is a success, remember these core principles:
- Foundation First: Always start with a clean, even foundation row. A simple round of single crochet creates a stable base for more complex stitches and ensures a professional look.
- Stitch Count Matters: Pay close attention to the stitch multiples required for decorative borders. Planning your foundation row accordingly saves you from frustrating corrections later.
- Tension is Everything: Consistency is your best friend. Maintaining even tension throughout the edging will prevent unwanted ruffling or pulling, allowing your chosen border to lay flat and look its best.
Your Next Creative Steps
Feeling inspired? The best way to master these techniques is to put them into practice. Grab some scrap yarn and a hook to create a small swatch. Experiment with the different edgings we've covered, from the classic elegance of the Scalloped border to the fun, bohemian vibe of Fringe. See how different yarn weights affect the final look.
This hands-on practice builds muscle memory and gives you the confidence to apply the perfect edging for crochet scarf projects you create. Remember that crafting is a source of joy and a way to create moments of peace in our busy lives. Take pride in the beautiful, unique piece you've made. Keep your hooks busy, your heart happy, and continue to share the warmth and connection that comes from a handmade gift.
Ready to start your next project with materials that bring out the best in every stitch? Explore the curated yarn collections and ergonomic hooks at Crochetree. We provide high-quality supplies designed to make your crafting experience joyful and your finished pieces last a lifetime. Find the perfect yarn for your next scarf at Crochetree and give your creation the beautiful finish it deserves.


![The Ultimate Beginner's Guide to Crochet [2026]](http://crochetree.com/cdn/shop/articles/feat-ultimate-beginners-guide-to-crochet_eae81cec-84d0-455d-b190-08cd22d826c4.jpg?v=1777713815&width=533)


