Crochet is a beautiful craft that transforms simple yarn into intricate designs, lovey dolls and other toys, wearable art, and cozy home decor. At the heart of every stunning crochet project lies a well-written pattern—a roadmap that guides you stitch by stitch to the final creation. However, for many, especially beginners, deciphering a crochet pattern can feel like learning a new language.
Fear not! This comprehensive guide will demystify crochet patterns, empowering you to tackle any project with confidence.
Why Learn to Read Crochet Patterns?
- Expand Your Creativity: Unlock a world of patterns beyond the basic stitches.
- Consistency: Achieve the intended size and look of the project.
- Efficiency: Save time by understanding instructions without constant guesswork.
- Skill Development: Enhance your crochet skills by learning new techniques and stitches.
Anatomy of a Crochet Pattern
Understanding the structure of a crochet pattern is the first step toward mastery. Most patterns are organized into several key sections:
1. Title
The name of the project (e.g., "Louise Crochet Doll Pattern", "Cozy Cable Knit Blanket" or "Amigurumi Bunny").
2. Introduction or Description
A brief overview of the project, sometimes including the inspiration behind it or suggested uses.
3. Materials Needed
A detailed list of everything you’ll need:
- Yarn: Type, weight, and quantity.
- Hook Size: Specified in millimeters (mm) or letters (e.g., H/8 or 5 mm).
- Notions: Additional items like stitch markers, yarn needles, buttons, or stuffing.
- Optional Materials: Items that enhance but aren't essential (e.g., beads, ribbon).
4. Gauge (Tension)
- Definition: The number of stitches and rows per inch/cm. This is even more important if you are making garments, in which the size matters the most.
- Importance: Ensures your project matches the pattern’s dimensions.
- How to Measure: Crochet a swatch using the recommended stitch pattern, then measure.
5. Abbreviations and Symbols
A key to the shorthand used throughout the pattern:
- Standard Stitches: sc (single crochet), dc (double crochet), hdc (half double crochet).
- Special Stitches: Explained in detail if they're unique or uncommon.
- Symbols: Used in charts or diagrams, representing stitches visually.
6. Notes or Pattern Notes
Important information specific to the pattern:
- Construction Method: Worked in rounds (spiral rounds, joing rounds, turning rounds), rows, or modular pieces.
- Color Changes: Tips on when and how to switch colors.
- Techniques: Any special methods required (e.g., tapestry crochet, Tunisian crochet).
7. Instructions
The step-by-step guide to creating the project:
- Row or Round Numbers: Each step is usually numbered for easy reference.
- Stitch Instructions: Detailed directions for each part.
- Repetitions: Indicated by brackets [], parentheses (), or asterisks *.
- Shaping Instructions: Increases, decreases, and other methods to shape the piece.
8. Finishing
- Assembly: How to put together different pieces.
- Edging: Instructions for borders or trims.
- Embellishments: Adding buttons, embroidery, or other decorations.
- Blocking: Techniques to shape and set the final piece.
9. Visual Aids
- Photographs: Images of the several steps, or of the finished product from various angles.
- Diagrams or Schematics: Visual representations of dimensions and construction.
- Stitch Charts: Graphical symbols showing stitch placement.
Decoding Common Crochet Abbreviations
Crochet patterns use abbreviations to keep instructions concise. Familiarize yourself with these standard terms:
- ch: chain
- sc: single crochet
- hdc: half double crochet
- dc: double crochet
- tr: treble crochet
- sl st: slip stitch
- inc: increase (usually by working two stitches in one stitch)
- dec: decrease (combining two stitches into one)
- rep: repeat
- tog: together (e.g., sc2tog means single crochet two stitches together)
- yo: yarn over
- RS/WS: right side/wrong side
Tip: Always refer to the pattern’s abbreviation key, as some designers may use unique abbreviations.
Understanding Pattern Instructions
Patterns communicate instructions in a specific format. Here’s how to interpret them:
1. Reading Rows and Rounds- Rows: Worked back and forth; you'll turn your work at the end of each row (some designers call them rounds as well, but they will then indicate that you should be working in "turning rounds").
- Rounds: Worked in a continuous circle or spiral; may join rounds with a slip stitch. They are usually called "spiral or continuous rounds" when you don't need to join the rounds with a slip stitch. When you have to join, then they are called "joining rounds".
2. Repetitions and Brackets
- Parentheses ( ) or Brackets [ ]: Group stitches to be worked in the same place or sequence. Brackets are also used at the end of the rounds to indicate the total number of stitches in that specific round (e.g. [12]).
- **Asterisks *: Indicate sections to repeat.
3. Special Stitches
- Defined in the Notes: Any stitch that isn't standard will be explained.
- Practice First: Try out special stitches on a swatch before incorporating them into your project.
4. Increasing and Decreasing
-
Increase (inc): Adding stitches to widen your work.
- Example: Inc in next st means work two stitches in one stitch.
-
Decrease (dec): Reducing stitches to narrow your work.
- Example: Sc2tog means single crochet two stitches together.
5. Stitch Counts
-
At the End of Instructions: Often, patterns indicate the number of stitches you should have.
- Example: [24]
- Importance: Helps verify you're on track.
Mastering Gauge (Tension)
Gauge ensures your finished item matches the pattern's size.
How to Create a Gauge Swatch
- Use Recommended Yarn and Hook: Start with what's specified.
- Crochet the Swatch: Usually a 4x4 inch (10x10 cm) square in the specified stitch pattern.
- Measure Carefully: Count the number of stitches and rows per inch/cm.
- Adjust if Necessary:
- Too Many Stitches Per Inch: Switch to a larger hook.
- Too Few Stitches Per Inch: Switch to a smaller hook.
Tips for Reading Complex Patterns
1. Highlighting and Annotating
- Use Highlighters or Pens: Mark sizes, stitch counts, or sections relevant to your project.
- Check Off Rows/Rounds: Keep track of your progress.
2. Read the Entire Pattern First
- Familiarize Yourself: Understand the flow and any potential challenges.
- Identify Special Techniques: Note any unfamiliar stitches to practice.
3. Break It Down
- One Step at a Time: Focus on one instruction before moving to the next.
- Use Stitch Markers: They can indicate repeats, increases, or pattern changes.
4. Practice Repeats Separately
- Swatch Repetitive Sections: Helps you get comfortable with the pattern rhythm.
Working with Charts and Diagrams
Visual representations can be incredibly helpful.
1. Stitch Charts
Symbols Represent Stitches: Each symbol corresponds to a stitch type.Direction of Work: Arrows or numbers indicate where to start and the order of stitches.
2. Reading Schematics
Dimensions: Provide measurements for different parts of the project.Shaping Guides: Show how pieces fit together.
Tip: If you're a visual learner, you might find charts easier than written instructions.
Common Challenges and Solutions
1. Confusion with Abbreviations - Solution: Keep an abbreviation list handy for quick reference.
2. Losing Track of Rows or Rounds - Solution: Use row counters, apps, or simple tally marks on paper.
3. Misunderstanding Repeats - Solution: Physically highlight repeat sections in different colors.
4. Variations in Terminology - US vs. UK Terms: Be aware that crochet terms differ between the US and UK.
Key Differences:
US Single Crochet (sc) = UK Double Crochet (dc)
US Double Crochet (dc) = UK Treble Crochet (tr)
Always check if the pattern uses US or UK terminology.
Engaging with the Crochet CommunityPractice Makes Perfect
- Start Small: Choose beginner-friendly patterns to build confidence.
- Repeat Patterns: Making an item more than once reinforces learning.
- Experiment: Don’t be afraid to modify patterns slightly as you become more comfortable.
Final Thoughts
Reading crochet patterns opens up endless possibilities in your crafting journey. Like learning any new skill, it takes time and practice. Be patient with yourself, celebrate small victories, and remember that every expert was once a beginner.
So grab your hook, choose a pattern that excites you, and start stitching your way to crochet mastery!
Additional Resources
- Crochet Abbreviation Guides: Downloadable PDFs or bookmark online resources.
- Stitch Libraries: Books or websites that provide instructions for various stitches.
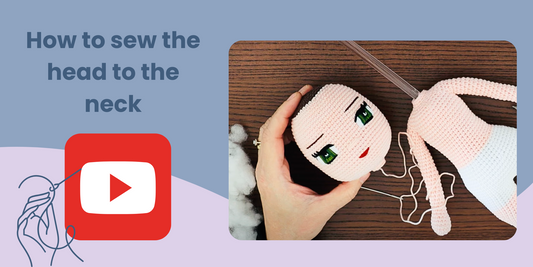
- Video Tutorials: Visual learners can benefit from step-by-step videos.
Happy Crocheting! 🧶❤️


